Land Nav Task 4 – Determine the Grid Coordinates of a Point on a Military Map

Standards: Determined the six-digit grid coordinates for the point on the map with a 100-meter tolerance. Recorded the grid coordinates with the correct two-letter 100,000-meter-square identifier.

Conditions:
Given a standard 1:50,000-scale military map in a field location, a 1:50,000 grid coordinate scale, a pencil, paper, and a point on the map for which coordinates must be determined.

Standards:
Determined the six-digit grid coordinates for the point on the map with a 100-meter tolerance. Recorded the grid coordinates with the correct two-letter 100,000-meter-square identifier.

Performance Steps

Note.

  1. A military map can help you spot your location accurately. The map has vertical lines (top to bottom) and horizontal lines (left to right). These lines form small squares 1,000 meters on each side, called grid squares.
  2. The lines that form grid squares are numbered along the outside edge of the map picture. No two grid squares have the same number.
  3. The precision of a point location is shown by the number of digits in the coordinates; the more digits, the more precise the location. For example: 1996-A 1,000-meter grid square. 192961-To the nearest 100 meters.

1.Look at figure C-11. Your address is grid square 1181. To determine your address, start from the left and read right until you come to 11, the first half of your address. Then read up to 81, the other half. Your address is somewhere in grid square 1181.

Land Nav Task 4 | Grid Coordinates on Military Map Figure C-11. Grid square 1181

Figure C-11. Grid square 1181

2. Determine your address to the nearest 100 meters. Grid square 1181 gives your general neighborhood, but there is a lot of ground inside that grid square. To make your address more accurate, just add another number to the first half and another number to the other half so your address has six numbers instead of four.

  • a. To get these extra numbers, suppose that each grid square has 10 lines inside it running north and south, and another 10 running east and west. This makes 100 smaller squares. You can estimate where these imaginary lines are (figure C-12).
Figure C-12. Grid square 1181 divided

Figure C-12. Grid square 1181 divided

  • b. To get these extra numbers, suppose that each grid square has 10 lines inside it running north and south, and another 10 running east and west. This makes 100 smaller squares. You can estimate where these imaginary lines are (figure C-12).Suppose you are halfway between grid line 11 and grid line 12. Then the next number is 5 and the first half of your address is 115. Now suppose you are also 3/10 of the way between grid line 81 and grid line 82. Then the second half of your address is 813. Your address would be 115813 (figure C-12). (If you are exactly on line 81, the second half would be 810.)a. To get these extra numbers, suppose that each grid square has 10 lines inside it running north and south, and another 10 running east and west. This makes 100 smaller squares. You can estimate where these imaginary lines are (figure C-12).

3. Use a coordinate scale. The most accurate way to determine the coordinates of a point on a map is to use a coordinate scale. You do not have to use imaginary lines because you can come up with the exact coordinates. This scale is on the coordinate scale and protractor (GTA 05-02-012) (figure C-13) or the plotting scale (figure C-14). Both of these devices include two coordinate scales, 1:25,000 and 1:50,000 meters. Make sure that when you use either of these devices, you use the correct scale.

Figure C-13. Coordinate scale and protractor

Figure C-13. Coordinate scale and protractor

Figure C-14. Plotting scale

Figure C-14. Plotting scale

  • a. Locate the grid square in which the point is located (for example, point A, figure C-15) (the point should already be plotted on the map).
  • b. The number of the vertical grid line on the left (west) side of the grid square gives the first and second digits of the coordinate.
  • c. The number of the horizontal grid line on the bottom (south) side of the grid square gives the fourth and fifth digits of the coordinate.
  • d. Place a coordinate scale on the bottom horizontal grid line of the grid square containing point A to determine the third and sixth digits of the coordinate.
  • e. Check to see that the zeros of the coordinate scale are in the lower left-hand (southwest) corner of the grid square where point A is located (figure C-15).
Figure C-15. Placement of the coordinate scale

Figure C-15. Placement of the coordinate scale

  • f. Slide the scale to the right, keeping the bottom of the scale on the bottom grid line until point A is under the vertical (right-hand) scale (figures C-16 and C-17). To determine the six-digit coordinate, the 100-meter mark on the bottom scale, which is nearest the vertical grid line, is the third digit of the number 115. The 100-meter mark on the vertical scale, which is nearest point A, is the sixth digit of the number 813. Putting these together, you have 115813.
Figure C-16. Aligning the coordinate scale

Figure C-16. Aligning the coordinate scale

Figure C-17. Aligning the plotting scale

Figure C-17. Aligning the plotting scale

  • g. To determine the correct two-letter 100,000-meter-square identifier, look at the grid reference box in the margin of the map (figure C-18).
Figure C-18. Grid reference box

Figure C-18. Grid reference box

  • h. Place the 100,000-meter-square identifier in front of the coordinate, GL115813.

Evaluation Preparation:

Setup: Give the soldier a standard 1:50,000-scale military map in a field location, a 1:50,000 grid coordinate scale, a pencil, paper, and a point on a map for which coordinates must be determined.

Brief Soldier: Tell the soldier to write down the two-letter 100,000-meter-square identifier and the six-digit grid coordinates for one point and the two-letter 100,000-meter-square identifier.

Performance MeasuresGONO GO
1. Determined the six-digit grid coordinates for the point on the map with a 100-meter tolerance.
2. Recorded the grid coordinates with the correct two-letter 100,000-meter-square identifier.

Evaluation Guidance:
Score the soldier GO if all performance measures are passed. Score the soldier NO GO if any performance measure is failed. If the soldier scores NO GO, show the soldier what was done wrong and how to do it correctly.


Land Nav Task 2 – Identify Topographic Symbols on a Military Map

Standards: Identified topographic symbols, colors, and marginal information on a military map with 100 percent accuracy.

Conditions:
Given a standard 1:50,000-scale military map.

Standards:
Identified topographic symbols, colors, and marginal information on a military map with 100 percent accuracy.

Performance Steps

  1. Identify the colors on a military map.
  1.  
  • a. The ideal situation would be that every feature on that portion of the earth being mapped is shown on the map in its true shape and size. Unfortunately, that is impossible.
  • b. The amount of detail shown on a map increases or decreases, depending on its scale; for example, a map with a scale of 1:250,000.
  • c. Details are shown by topographic symbols. These symbols are shown using six basic colors as shown in table C-1.
Table C-1.
Colors on a topographic map
ColorsSymbols
BlackCultural (man-made) features other than roads
BlueWater
BrownAll
relief features-contour lines on old
maps-cultivated land on red-light
readable maps
GreenVegetation
RedMajor
roads, built-up areas, special
features on old maps
Red-BrownAll
relief features and main roads on
red-light readable maps

2. Identify the symbols used on a military map to represent physical features, such as physical surroundings or objects, as shown in table C-2.

Table C-2.
Features on topographic maps
Land Nav Task 2 | Topographic Symbols on a Military Map
  • a. The shape of an object on the map usually tells what it is, for example, a black, solid square is a building or a house; a round or irregular blue item is a lake or pond.
  • b. Logic and what the colors mean must work together in determining a map feature. For example, blue represents water. If you see a symbol that is blue and has clumps of grass, this would be a swamp.
  • c. The size of the symbol shows the approximate size of an object. Most symbols are enlarged 6 to 10 times so that you can see them under dim light.
  • d. Use the legend; it has most of the symbols used on the map.

2. Identify the marginal information found on the legend.

  • a. Marginal information at the top of the map sheet.
    • (1) The top left corner contains the geographic location of the map area and the scale of the map.
    • (2) The top center has the name of the map sheet.
    • (3) The top right corner contains the map edition, map series, and the map sheet number.
  • b. Marginal information at the bottom of the map sheet.
    • (1) The lower left corner of the map contains the legend, the name of the agency that prepared the map, the map sheet number, and the map sheet name.
    • (2) The bottom center contains the bar scales in meters, yards, miles, and nautical miles; the contour interval of the contour lines; the grid reference box; the declination diagram; and the G-M angle (mils or degrees).
    • (3) The lower right corner contains the elevation guide, the adjoining map sheet diagram, and the boundaries box, which shows any boundaries that may be on the map.
 

Evaluation Preparation:

Setup: On a 1:50,000-scale military map, circle each item of marginal information found on the map. Randomly letter the circled items A through J. Circle an item or feature shown on the map by color. Randomly number each colored item 1 through 10. The items are listed in the Evaluation Guide/Performance Measures. Have a sheet of paper and two pencils available for the soldier being tested. For each soldier tested, provide a duplicate set of the map, paper, and pencils.

Brief Soldier: Tell the soldier to letter the paper A through J and 1 through 10. Tell the soldier to write down the name of the item contained in each lettered and numbered circle on the map.

Performance MeasuresGONo GO
1. Identified the sheet name.
2. Identified the sheet number.
3. Identified the contour
interval.
4. Identified the G-M angle (mils or degrees).
5. Identified the legend.
6. Identified the bar scales.
7. Identified the declination diagram.
8. Identified the grid reference box.
9. Identified the adjoining map sheets diagram.
10. Identified the elevation guide.
11. Identified 2 of 2 specific man-made features (shown in black on the map).
12. Identified 2 of 2 water features (blue on the map).
13. Identified 2 of 2 vegetation features (green on the map).
14. Identified 2 of 2 man-made features; for example, main roads or build-up areas (shown in brown or red-brown on the map).
15. Identified 2 of 2 contour lines (shown in brown or red-brown on the map).

Evaluation Guidance:
Score the soldier GO if all performance measures are passed. Score the soldier NO GO if any performance measure is failed. If the soldier scores NO GO, show the soldier what was done wrong and how to do it correctly.


Military Problem Solving Process

To define the 7 steps of the Military Problem Solving Process. To describe some of the Road Blocks to problem solving

Click here to download the presentation.

Military Problem Solving Process

MILITARY PROBLEM SOLVING PROCESS

INSTRUCTOR CPT REINHARD

PURPOSE

To define the 7 steps of the Military Problem Solving Process

To describe some of the Road Blocks to problem solving

REFERENCES

FM 22-100 Army Leadership

FM 101-5 Staff Organization and Operations (Chapter 5)

OUTLINE

Problem Solving Steps

Practical Exercise

Road Blocks to Problem Solving

Summary

Conclusion

PROBLEM SOLVING PROCESS

1. Recognize And Define The Problem

2. Gather Facts And Make Assumptions

3. Define End States And Establish Criteria

4. Develop Possible Solutions

5. Analyze And Compare Possible Solutions

6. Select And Implement Solution

7. Analyze Solution For Effectiveness

#1 WHAT IS THE PROBLEM?

#2 FACTS & ASSUMPTIONS

Facts– Statements about the problem known to be true or there is positive proof.

Assumptions– Statement used to replace necessary but missing or unknown facts.

#3 DEFINE END STATE AND ESTABLISH CRITERIA

End States identify goals and objectives

Criteria

Selection- used to gather valid solution

Evaluation- used to compare solutions

#4 DEVELOP POSSIBLE
SOLUTIONS

Brain Storming

Mind Mapping

#5 ANALYZE AND COMPARE POSSIBLE SOLUTIONS

Use predetermined evaluation criteria

Go back to “Facts and Assumptions” or “Establish Criteria” if necessary

#6 SELECT AND IMPLEMENT THE BEST SOLUTION

Make the decision

Acceptable, Feasible, and Suitable

#7 ANALYZE SOLUTION FOR EFFECTIVENESS

May take time

AAR

If it works, pass it on!

PRACTICAL EXERCISE

PROBLEM SOLVING PROCESS

1. Recognize And Define The Problem

2. Gather Facts And Make Assumptions

3. Define End States And Establish Criteria

4. Develop Possible Solutions

5. Analyze And Compare Possible Solutions

6. Select And Implement Solution

7. Analyze Solution For Effectiveness

ROAD BLOCKS TO
PROBLEM SOLVING

Fear Of Failure

Tunnel Vision

Over Seriousness

Over Certainty

Binding Customs

Fear Of The Unknown

Command Pressure

ROAD BLOCKS TO PROBLEM SOLVING (cont.)

FAILURE TO PROPERLY IDENTIFY THE PROBLEM

FAILURE TO TALK WITH OTHERS WHO HAVE DEALT WITH THE PROBLEM

LACK OF ADEQUATE INFORMATION TO MAKE VALID ASSUMPTIONS

NOT IDENTIFYING ALL OF THE PLAYERS

NOT SPECIFYING THE DESIRED ENDSTATE

SUMMARY

Problem Solving Steps

Practical Exercise

Road Blocks to Problem Solving

CONCLUSION

The goal is to have high-quality, acceptable decisions made in combat and training situations. The Military Problem Solving Process helps leaders face complex problems in situations where information might be limited.


OCOKA Observation and Fields of Fire, Cover and Concealment, Obstacles (man made and natural), Key or Decisive Terrain, Avenues of Approach

Observation and Fields of Fire, Cover and Concealment,
Obstacles (man made and natural), Key or Decisive Terrain, Avenues of Approach

Observation and Fields of Fire
Cover and Concealment
Obstacles (man made and natural)
Key or Decisive Terrain
Avenues of Approach

All of these factors must be analyzed in light of

the mission of the unit
the type operation
the level of command
the composition of forces involved
the weapons and equipment expected to be encountered

1. Observation and Fields of Fire

The evaluation of observation and fields of fire allows you to-

Identify potential engagement areas
Identify defensible terrain and weapons system positions.
Identify where maneuvering forces are most vulnerable to observation and fires.

Observation

Observation is the ability to see over a particular area to acquire targets.

“Visibility” is weather dependent or is a temporary phenomena. Observation, on the other hand, is terrain dependent and is relatively permanent. Generally, the best observation is obtained from the highest terrain in an area.

Fields of Fire

The area a weapon can cover effectively from a given point
Fires can be of two basic types

Direct fire weapons like machine guns, rifles, and TOW weapon systems which require direct line of sight to their targets.
Indirect fire weapons such as mortars and artillery
Observation and fields of fire are not the same. You may be able to see 25 km, but if all you see are armed with a rifle, then your fields of fire will probably be limited to something like 500 meters.

2. Cover and Concealment

Cover

The protection from the effects of weapons fires, direct, indirect, and air to ground.

Certain aspects of the terrain may provide good cover from some fires, while some may provide cover from only one of these types.

Concealment

Protection from observation, either from the air or from the ground or both.

Examples:

slope
vegetation
built up areas

Remember that cover can be used to protect a force from the effects of direct and indirect fires. Also it can, in some cases, be used to protect a force from observation. If this is the case, then the object providing cover is also providing concealment. But cover and concealment do not always equate.

If an attacking force can move forward under concealment, the chances of achieving surprise increase. Concealed and covered approach routes are important to reconnaissance units, dismounted infantry, and insurgent or terrorist forces.

Defending forces seek to defend in an area which offers both concealment and cover to themselves but which does not provide covered approaches for the threat

3. Obstacles

Any natural or manmade terrain feature that stops, impedes, slows, or diverts movement.

Examples:

buildings, steep slopes, rivers, lakes, forests, deserts, swamps, jungles, cities, minefield, trenches, andmilitary wire obstacles

Things to look for:

Vegetation (tree spacing and trunk diameter).
Surface drainage (stream width, depth, velocity, bank slope, and height).
Surface materials (soil types and conditions that affect mobility).
Surface configuration (slopes that affect mobility).
Obstacles (natural and manmade; consider obstacles to flight as well as ground mobility).
Transportation systems (bridge classifications and road characteristics such as curve,radius, slopes, and width)
Effects of actual or projected weather such as heavy precipitation or snow over.

4. Key or Decisive Terrain

Some terrain feature (natural or manmade) which, if controlled, will give a marked advantage to whoever controls it.
Often selected for use as battle positions or objectives
Echelon of command, mission, enemy, and situation dependent.
To designate terrain as decisive is to recognize that the mission depends on seizing or retaining it.
Key or decisive terrain must be controlled, not necessarily occupied. It may be controlled by either fires or maneuver.

Examples:

a bridge over an unfordable river which gives access to the opposite shore without requiring an assault crossing.
a level clearing in rough terrain which is the only accessible landing field for airmobile operations
if you identify only one valid avenue of approach to the command’s objective, then the choke points on that avenue will probably become key terrain (compared to a situation where several AAs are available).

5. Avenues of Approach (AoA)

An AoA is an air or ground route of an attacking force of a given size leading to its objective or to key terrain in its path.


Measure Map Distance on a Military Map

A graphic scale is a ruler printed on the map and is used to convert distances on the map to actual ground distances. The graphic scale is divided into two parts. To the right of the zero, the scale is marked in full units of measure and is called the primary scale. To the left of the zero, the scale is divided into tenths and is called the extension scale. Most maps have three or more graphic scales, each using a different unit of measure. When using the graphic scale, be sure to use the correct scale for the unit of measure desired.

Using a graphic (bar) scale.

a. To determine straight-line distance between two points on a map, lay a straight-edged piece of paper on the map so that the edge of the paper touches both points and extends past them. Make a tick mark on the edge of the paper at each point.

Transferring map distance to paper strip.

b. To convert the map distance to ground distance, move the paper down to the graphic bar scale, and align the right tick mark (b) with a printed number in the primary scale so that the left tick mark (a) is in the extension scale.

Measuring straight-line map distance.

c. The right tick mark (b) is aligned with the 3,000-meter mark in the primary scale, thus the distance is at least 3,000 meters. To determine the distance between the two points to the nearest 10 meters, look at the extension scale. The extension scale is numbered with zero at the right and increases to the left. When using the extension scale, always read right to left. From the zero left to the beginning of the first shaded area is 100 meters. From the beginning of the shaded square to the end of the shaded square is 100 to 200 meters. From the end of the first shaded square to the beginning of the second shaded square is 200 to 300 meters. Remember, the distance in the extension scale increases from right to left.

d. To determine the distance from the zero to tick mark (a), divide the distance inside the squares into tenths. As you break down the distance between the squares in the extension scale into tenths, you will see that tick mark (a) is aligned with the 950-meter mark. Adding the distance of 3,000 meters determined in the primary scale to the 950 meters you determined by using the extension scale, we find that the total distance between points (a) and (b) is 3,950 meters.

e. To measure distance along a road, stream, or other curved line, the straight edge of a piece of paper is used. In order to avoid confusion concerning the point to begin measuring from and the ending point, an eight-digit coordinate should be given for both the starting and ending points. Place a tick mark on the paper and map at the beginning point from which the curved line is to be measured. Align the edge of the paper along a straight portion and make a tick mark on both map and paper when the edge of the paper leaves the straight portion of the line being measured.

Military Maps

Measuring a curved line

f. Keeping both tick marks together (on paper and map), place the point of the pencil close to the edge of the paper on the tick mark to hold it in place and pivot the paper until another straight portion of the curved line is aligned with the edge of the paper. Continue in this manner until the measurement is completed.

g. When you have completed measuring the distance, move the paper to the graphic scale to determine the ground distance. The only tick marks you will be measuring the distance between are tick marks (a) and (b). The tick marks in between are not used.

h. There may be times when the distance you measure on the edge of the paper exceeds the graphic scale. In this case, there are different techniques you can use to determine the distance.

(1) One technique is to align the right tick mark (b) with a printed number in the primary scale, in this case the 5. You can see that from point (a) to point (b) is more than 6,000 meters when you add the 1,000 meters in the extension scale. To determine the exact distance to the nearest 10 meters, place a tick mark (c) on the edge of the paper at the end of the extension scale. You know that from point (b) to point (c) is 6,000 meters. With the tick mark (c) placed on the edge of the paper at the end of the extension scale, slide the paper to the right. Remember the distance in the extension is always read from right to left. Align tick mark (c) with zero and then measure the distance between tick marks (a) and (c). The distance between tick marks (a) and (c) is 420 meters. The total ground distance between start and finish points is 6,420 meters.

Determining the exact distance.

(2) Another technique that may be used to determine exact distance between two points when the edge of the paper exceeds the bar scale is to slide the edge of the paper to the right until tick mark (a) is aligned with the edge of the extension scale. Make a tick mark on the paper, in line with the 2,000-meter mark (c). Then slide the edge of the paper to the left until tick mark (b) is aligned with the zero. Estimate the 100-meter increments into 10-meter increments to determine how many meters tick mark (c) is from the zero line. The total distance would be 3,030 meters.

Reading the extension scale.

(3) At times you may want to know the distance from a point on the map to a point off the map. In order to do this, measure the distance from the start point to the edge of the map. The marginal notes give the road distance from the edge of the map to some towns, highways, or junctions off the map. To determine the total distance, add the distance measured on the map to the distance given in the marginal notes. Be sure the unit of measure is the same.

(4) When measuring distance in statute or nautical miles, round it off to the nearest one-tenth of a mile and make sure the appropriate bar scale is used.

(5) Distance measured on a map does not take into consideration the rise and fall of the land. All distances measured by using the map and graphic scales are flat distances. Therefore, the distance measured on a map will increase when actually measured on the ground. This must be taken into consideration when navigating across country.


Locate a point using the US Army Military Grid Reference System (MGRS)

There is only one rule to remember when reading or reporting grid coordinates, always read to the RIGHT and then UP. The first half of the reported set of coordinate digits represents the left-to-right (easting) grid label, and the second half represents the label as read from the bottom to top (northing). The grid coordinates may represent the location to the nearest 10-, 100-, or 1,000-meter increment.

a. Grid Zone. The number 16 locates a point within zone 16, which is an area 6° wide and extends between 80° S latitude and 84° N latitude (Figure 4-8).

b. Grid Zone Designation. The number and letter combination, 16S, further locates a point within the grid zone designation 16S, which is a quadrangle 6° wide by 8° high. There are 19 of these quads in zone 16. Quad X, which is located between 72° N and 84° N latitude, is 12° high (Figure 4-8).

c. 100,000-Meter Square Identification. The addition of two more letters locates a point within the 100,000-meter grid square. Thus 16SGL (Figure 4-11) locates the point within the 100,000-meter square GL in the grid zone designation 16S. For information on the lettering system of 100,000-meter squares, see TM 5-241-1.

d. 10,000-Meter Square. The breakdown of the US Army military grid reference system continues as each side of the 100,000-meter square is divided into 10 equal parts. This division produces lines that are 10,000 meters apart. Thus the coordinates 16SGL08 would locate a point as shown in Figure 4-20. The 10,000-meter grid lines appear as index (heavier) grid lines on maps at 1:100,000 and larger.

US Army Military Grid Reference System

Figure 4-20. The 10,000-meter grid square.

e. 1,000-Meter Square. To obtain 1,000-meter squares, each side of the 10,000-meter square is divided into 10 equal parts. This division appears on large-scale maps as the actual grid lines; they are 1,000 meters apart. On the Columbus map, using coordinates 16SGL0182, the easting 01 and the northing 82 gives the location of the southwest corner of grid square 0182 or to the nearest 1,000 meters of a point on the map (Figure 4-21).

Figure 4-21. The 1,000-meter grid square.

f. 100-Meter Identification. To locate to the nearest 100 meters, the grid coordinate scale can be used to divide the 1,000-meter grid squares into 10 equal parts (Figure 4-22).

Figure 4-22. The 100-meter and 10-meter grid squares.

g. 10-Meter Identification. The grid coordinate scale has divisions every 50 meters on the 1:50,000 scale and every 20 meters on the 1:25,000 scale. These can be used to estimate to the nearest 10 meters and give the location of one point on the earth’s surface to the nearest 10 meters.

EXAMPLE: 16SGL01948253 (gas tank) (Figure 4-22).

h. Precision. The precision of a point’s location is shown by the number of digits in the coordinates; the more digits, the more precise the location.


Draw (Minor Terrain Feature)

Draw. A draw is a less developed stream course than a valley. In a draw, there is essentially no level ground and, therefore, little or no maneuver room within its confines. If you are standing in a draw, the ground slopes upward in three directions and downward in the other direction. A draw could be considered as the initial formation of a valley. The contour lines depicting a draw are U-shaped or V-shaped, pointing toward high ground

Draw Minor Terrain Feature
 

Determine the Grid Coordinates of a Point on a Military Map

CONDITIONS
Given a standard 1:50,000 scale military map, a 1:50,000 grid coordinate scale, pencil, paper, and a point on the map for which coordinates must be determined.

STANDARDS
Determine the six-digit grid coordinates for the point on the map with a 100?meter tolerance (grid coordinates must contain the correct two-letter 100,000 meter-square identifier).

TRAINING AND EVALUATION
Training Information Outline

Notes: 1. To keep from getting lost, a soldier must know how to find out where he is. A combat area has no street addresses, but a military map can help you identify a location accurately. The map has vertical lines (top to bottom) and horizontal lines (left to right). These lines form small squares 1,000 meters on each side called grid squares.

2. The lines that form grid squares are numbered along the outside edge of the map picture. No two grid squares have the same number.

3. The precision of a point location is shown by the number of digits in the coordinates: the more digits, the more precise the location.

1996- a 1,000-meter grid square.
192961- to the nearest 100 meters.
19269614- to the nearest 10 meters.

1. Look at Figure 5-18. Your address is grid square 1181. How do you know this? Start from the left and read right until you come to 11, the first half of your address. Then read up to 81, the other half. Your address is somewhere in grid square 1181 (A, Figure 5-18).

2. Grid square 1181 gives your general neighborhood, but there is a lot of ground inside that grid square. To make your address more accurate, just add another number to the first half and another number to the second half-so your address has six numbers instead of four.

a. To get those extra numbers, pretend that each grid square has ten lines inside it running north and south, and another 10 running east and west. This makes 100 smaller squares. You can estimate where these imaginary lines are.

b. Suppose you are halfway between grid line 11 and grid line 12. Then the next number is 5 and the first half of your address is 115. Now suppose you are also 3/10 of the way between grid line 81 and grid line 82. Then the second half of your address is 813. (If you were exactly on line 81, the second part would be 810). Your address is 115813 (B, Figure 5-18).

Figure 5-18. Determining a six-digit grid coordinate.

3. The most accurate way to determine the coordinates of a point on a map is to use a coordinate scale. You do not have to use imaginary lines; you can find the exact coordinates using a Coordinate Scale and Protractor (GTA 5-2-12) (Figure 5-19) or a Plotting Scale (Figure 5-20). Each device has two coordinating scales, 1:25,000 meters and 1:50,000 meters. Make sure you use the correct scale.

Figure 5-19. Coordinate scale and protractor.

a. First, locate the grid square in which the point (for example, Point A, Figure 5-21, page 5-24) is located (the point should already be plotted on the map).

b. The number of the vertical grid line on the left (west) side of the grid square is the first and second digits of the coordinates.

Figure 5-20. Plotting scale.

c. The number of the horizontal grid line on the bottom (south) side of the grid square is the fourth and fifth digits of the coordinates.

d. To determine the third and sixth digits of the coordinates, place the coordinate scale on the bottom horizontal grid line of the grid square containing Point A.

Figure 5-21. Placement of coordinate scale.

e. Check to see that the zeros of the coordinate scale are in the lower left-hand (southwest) corner of the map grid square (Figure 5-21).

f. Slide the scale to the right, keeping the bottom of the scale on the bottom grid line until Point A is under the vertical (right-hand) scale (Figures 5-22 and 5-23). On the bottom scale, the 100-meter mark nearest the vertical grid line provides the third digit, 5. On the vertical scale, the 100-meter mark nearest Point A provides the sixth digit, 3. Therefore, the six-digit grid coordinate is 115813.

Figure 5-22. Alignment of coordinate scale.

Figure 5-23. Alignment of plotting scale.

g. To determine the correct two-letter 100,000?meter square identifier, look at the grid reference box in the margin of the map (Figure 5-24).

h. Place the 100,000-meter square identifier in front of the coordinate, GL 11508133.

Figure 5-24. Grid reference box.

Evaluation Guide:
Determine the Grid Coordinates of a Point on a Military Map
Performance Measures

1. Write down the two-letter 100,000-meter square identifier and the six?digit grid coordinates for the designated point with a 100?meter tolerance.

2. Record the grid coordinates with the correct two-letter 100,000-meter square identifier.


Cut and a Fill (Supplementary Terrain Features)

Cut. A cut is a man-made feature resulting from cutting through raised ground, usually to form a level bed for a road or railroad track. Cuts are shown on a map when they are at least 10 feet high, and they are drawn with a contour line along the cut line. This contour line extends the length of the cut and has tick marks that extend from the cut line to the roadbed, if the map scale permits this level of detail

Fill. A fill is a man-made feature resulting from filling a low area, usually to form a level bed for a road or railroad track. Fills are shown on a map when they are at least 10 feet high, and they are drawn with a contour line along the fill line. This contour line extends the length of the filled area and has tick marks that point toward lower ground. If the map scale permits, the length of the fill tick marks are drawn to scale and extend from the base line of the fill symbol

Understanding Cut and Fill on a Map

When reading a topographic map, identifying cut and fill on a map is essential for understanding man-made modifications to the terrain. Cuts indicate areas where elevated ground has been removed to create a level surface, while fills show where low areas have been raised. Recognizing these features helps in navigation, construction planning, and terrain analysis.

How to Identify Cut and Fill on a Map

Cuts and fills are represented by contour lines with tick marks that indicate elevation changes. In a cut, the tick marks extend toward the roadbed, while in a fill, they point toward the lower ground. These features appear on maps only if they are at least 10 feet high, ensuring they are significant enough for practical reference.

Cut and a Fill
 

Steps and Marching

General Information

a. This section contains all of the steps in marching of the individual soldier. These steps should be learned thoroughly before proceeding to unit drill.

b. All marching movements executed from the halt are initiated from the position of attention.

c. Except for route step march and at ease march, all marching movements are executed while marching at attentionMarching at attention is the combination of the position of attention and the procedures for the prescribed step executed simultaneously.

d. When executed from the halt, all steps except right step begin with the left foot.

e. For short-distance marching movements, the commander may designate the number of steps forward, backward, or sideward by giving the appropriate command: One step to the right (left), MARCH; or, Two steps backward (forward), MARCH. On the command of execution MARCH, step off with the appropriate foot, and halt automatically after completing the number of steps designated. Unless otherwise specified, when directed to execute steps forward, the steps will be 30-inch steps.

f. All marching movements are executed in the cadence of quick time (120 steps per minute), except the 30-inch step, which may be executed in the cadence of 180 steps per minute on the command Double time, MARCH.

g. A step is the prescribed distance from one heel to the other heel of a marching soldier.

h. All 15-inch steps are executed for a short distance only.

The 30-Inch Step

a. To march with a 30-inch step from the halt, the command is Forward, MARCH. On the preparatory command Forward, shift the weight of the body to the right foot without noticeable movement. On the command of execution MARCH, step forward 30 inches with the left foot and continue marching with 30-inch steps, keeping the head and eyes fixed to the front. The arms swing in a natural motion, without exaggeration and without bending at the elbows, approximately 9 inches straight to the front and 6 inches straight to the rear of the trouser seams. Keep the fingers curled as in the position of attention so that the fingers just clear the trousers.

b. To halt while marching, the command Squad (Platoon), HALT is given. The preparatory command Squad (Platoon) is given as either foot strikes the marching surface as long as the command of execution HALT is given the next time that foot strikes the marching surface. The halt is executed in two counts. After HALT is commanded, execute the additional step required after the command of execution and then bring the trail foot alongside the lead foot, assuming the position of attention and terminating the movement.

NOTE: When marching, there are five steps in the step-by-step method: (1) preparatory command step, (2) intermediate step or thinking step, (3) command of execution step, (4) additional step after command of execution, (5) execution of the movement that was commanded.

The Change Step

a. To change step while marching, the command Change step, MARCH is given as the right foot strikes the marching surface. On the command of execution MARCH, take one more step with the left foot, then in one count place the right toe near the heal of the left foot and step off again with the left foot. The arms swing naturally.

b. This movement is executed automatically whenever a soldier finds himself out of step with all other members of the formation.

Rest Movement, 30-Inch Step

a. At Ease March. The command At ease, MARCH is given as either foot strikes the marching surface. On the command of execution MARCH, the soldier is no longer required to retain cadence; however, silence and the approximate interval and distance are maintained. Quick time, MARCH and Route step, MARCH are the only commands that can be given while marching at ease.

b. Route Step March. Route step is executed exactly the same as at ease march except that the soldier may drink from his canteen and talk.

NOTE: To change the direction of march while marching at route step or at ease march, the commander informally directs the lead element to turn in the desired direction. Before precision movements may be executed, the unit must resume marching in cadence. The troops automatically resume marching at attention on the command Quick time, MARCH, as the commander reestablishes the cadence by counting for eight steps.

The 15-Inch Step, Forward/Half Step

a. To march with a 15-inch step from the halt, the command is Half step, MARCH. On the preparatory command Half step, shift the weight of the body to the right foot without noticeable movement. On the command of execution MARCH, step forward 15 inches with the left foot and continue marching with 15-inch steps. The arms swing as in marching with a 30-inch step.

b. To alter the march to a 15-inch step while marching with a 30-inch step, the command is Half step, MARCH. This command may be given as either foot strikes the marching surface. On the command of execution MARCH, take one more 30-inch step and then begin marching with a 15-inch step. The arms swing as in marching with a 30-inch step.

c. To resume marching with a 30-inch step, the command Forward, MARCH is given as either foot strikes the marching surface. On the command of execution MARCH, take one more 15-inch step and then begin marching with a 30-inch step.

d. The halt while marching at the half step is executed in two counts, the same as the halt from the 30-inch step.

e. While marching at the half step, the only commands that may be given are: Mark time, MARCH; Forward, MARCH; Extend, MARCH; and HALT.

Marching in Place

a. To march in place, the command Mark time, MARCH is given as either foot strikes the marching surface and only while marching with a 30-inch or 15-inch step forward. On the command of execution MARCH, take one more step, bring the trailing foot alongside the leading foot, and begin to march in place. Raise each foot (alternately) 2 inches off the marching surface; the arms swing naturally, as in marching with a 30-inch step forward.

NOTE: While marking time in formation, the soldier adjusts position to ensure proper alignment and cover.

b. To resume marching with a 30-inch step, the command Forward, MARCH is given as either foot strikes the marching surface. On the command of execution MARCH, take one more step in place and then step off with a 30-inch step.

c. The halt from mark time is executed in two counts, basically the same as the halt from the 30-inch step.

The 15-Inch Step, Right/Left

a. To march with a 15-inch step right (left), the command is Right (Left) step, MARCH. The command is given only while at the halt. On the preparatory command of Right (Left) step, shift the weight of the body without noticeable movement onto the left (right) foot. On the command of execution MARCH, bend the right knee slightly and raise the right foot only high enough to allow freedom of movement. Place the right foot 15 inches to the right of the left foot, and then move the left foot (keeping the left leg straight) alongside the right foot as in the position of attention. Continue this movement, keeping the arms at the sides as in the position of attention.

b. To halt when executing right or left step, the command is Squad (Platoon), HALT. This movement is executed in two counts. The preparatory command is given when the heels are together the command of execution HALT is given the next time the heels are together. On the command of execution HALT, take one more step with the lead foot and then place the trailing foot alongside the lead foot, resuming the position of attention.

The 15-Inch Step, Backward

a. To march with a 15-inch step backward, the command is Backward, MARCH. The command is given only while at the halt. On the preparatory command Backward, shift the weight of the body without noticeable movement onto the right foot. On the command of execution MARCH, take a 15-inch step backward with the left foot and continue marching backward with 15-inch steps. The arms swing naturally.

b. The halt from backward march is executed in two counts, basically the same as the halt from the 30-inch step.

The 30-Inch Step, Double Time

a. To march in the cadence of 180 steps per minute with a 30-inch step, the command is Double time, MARCH. It may be commanded while at the halt or while marching at quick time with a 30-inch step.

b. When at the halt and the preparatory command Double time is given, shift the weight of the body to the right foot without noticeable movement. On the command of execution MARCH, raise the forearms to a horizontal position, with the fingers and thumbs closed, knuckles out, and simultaneously step off with the left foot. Continue to march with 30-inch steps at the cadence of double time. The arms swing naturally to the front and rear with the forearms kept horizontal. (When armed, soldiers will come to port arms on receiving the preparatory command of Double time.) Guides, when at sling arms, will double time with their weapons at sling arms upon receiving the directive GUIDE ON LINE.

c. When marching with a 30-inch step in the cadence of quick time, the command Double time, MARCH is given as either foot strikes the marching surface. On the command of execution MARCH, take one more 30-inch step at quick time, and step off with the trailing foot, double timing as previously described.

d. To resume marching with a 30-inch step at quick time, the command Quick time, MARCH is given as either foot strikes the marching surface. On the command of execution MARCH, take two more 30-inch steps at double time, lower the arms to the sides, and resume marching with a 30-inch step at quick time.

NOTE: Quick time, column half left (right), and column left (right) are the only movements that can be executed while double timing. Armed troops must be at either sling arms or port arms before the command Double time, MARCH is given.

Facing in Marching

a. Facings in marching from a halt are important parts of the following movements: alignments, column movements, inspecting soldiers in ranks, and changing from normal interval to double interval or double interval to normal interval. For instructional purposes only, the command Face to the right (left) in marching, MARCH may be used to teach the individual to execute the movement properly. On the preparatory command Face to the right (left) in marching, shift the weight of the body without noticeable movement onto the right foot. On the command of execution MARCH, pivot to the right (left) on the ball of the right foot (90 degrees) and step off in the indicated direction with the left foot. Execute the pivot and step in one count, and continue marching in the new direction.

b. Facing to the half-right (half-left) in marching from the halt is executed in the same manner as facing to the right (left) in marching from a halt, except the facing movement is made at a 45-degree angle to the right (left).

c. The halt from facing in marching is executed in two counts, the same as the halt from the 30-inch step.


Determine a Magnetic Azimuth Using a Lensatic Compass

CONDITIONS
Given a compass and a designated point on the ground.

STANDARDS
Determine the correct magnetic azimuth to the designated point within 3 degrees using the compass-to-cheek method, or within 10 degrees using the center-hold method.

TRAINING AND EVALUATION
Training Information Outline
1. Read your compass (Figures 5-25 and 5-26).

a. The floating dial is used to determine the direction in which you are pointing your compass.

b. The outer, “black” ring of numbers and tick marks is used for finding direction in mils.

Lensatic Compass
Lensatic Compass Magnetic Azimuth

c. The inner, “red” ring of numbers and tick marks is used for finding direction in degrees.

(1) There are 360 degrees or 6,400 mils in a circle. These are marked with a tick mark every 5 degrees and 20 mils. However, not every tick mark is numbered. You will have to determine the number for these lines using the numbers that are shown.

(2) To read direction, point the compass in the direction you want to go or want to determine.

(3) Look beneath the index line on the outer glass cover and estimate to the nearest degree or 10 mils the position of the index line over the (red or black) scale.

(4) Be careful to hold the compass still so that the dial remains stationary while you are reading the scale.

(5) In Figure 5-26, the readings are 312 degrees (red scale) and 5,500 mils (black scale).

(6) If you understand these readings and can apply either of the holding and sighting techniques of shooting an azimuth, you will be proficient in performing this task.

2. Shoot an azimuth.

a. Use your compass to determine or follow an azimuth. The arrow on the compass points toward magnetic north. The arrow is also attracted by any mass of metal-a truck, your rifle, your helmet, and even electrical power lines. Thus, be sure you use your compass away from metal objects so it will not give a wrong reading.

b. The lensatic compass must always be held level and firm when sighting on an object and reading an azimuth.

c. There are two methods of holding the lensatic compass and sighting.

(1) Compass-to-cheek method (Figure 5-27). To use this method-

(a) Open the cover to a 90-degree angle to the base. Position the eyepiece at a 45-degree angle to the base.

(b) Place your thumb through the thumb loop, form a steady base with your third and fourth fingers, and extend your index finger along the side of the compass base.

(c) Place the hand holding the compass into the palm of the other hand.

Figure 5-27. Compass-to-cheek method.

Compass-to-cheek method

(d) Bring both hands up to the face and position the thumb that is through the thumb loop against the cheekbone.

(e) Look through the lens of the eyepiece. If the dial is not in focus, move the eyepiece up or down until the dial is in focus.

(f) Align the sighting slot of the eyepiece with the sighting wire in the cover on the point to which the azimuth is being determined. Look through the lens of the eyepiece and read the azimuth under the index line.

(2) Center-hold method (Figure 5-28). Use this method only when a precise direction is not required:

(a) Open the compass so that the cover forms a straight edge with the base. The lens of the compass is moved out of the way.

Figure 5-28. Center-hold method.

Center-hold method

(b) Place your thumb through the thumb loop, form a steady base with your third and fourth fingers, and extend your index finger along the side of the compass.

(c) Place the thumb of the other hand between the eyepiece and the lens, extend the index finger along the remaining side of the compass, wrap the remaining fingers around the fingers of the other hand, and pull your elbows firmly into your sides. This will place the compass between your chin and your belt.

(d) To measure an azimuth, turn your entire body toward the object and point the compass cover directly at the object. Look down and read the azimuth from beneath the fixed black index line. This method can be used at night.

(e) To keep from going in circles when you are land navigating, stop occasionally to check the azimuth along which you are moving. Also, you can move from object to object along your path by shooting an azimuth to each object and then moving to that object. Repeating this process while you navigate should keep you straight.

Evaluation Guide:
Determine a Magnetic Azimuth
Performance Measures

1. Determine a magnetic Azimuth using a lensatic compass.

2. Use the compass-to-cheek method to within three degrees of a designated point.

3. Use the center-hold method within 10 degrees to a designated point.


Identify Major / Minor Terrain Features

Hill, Ridge, Valley, Saddle, Depression, Draw, Spur and Cliff

Terrain features are identified in the same manner on all maps, regardless of the contour interval, but you must realize that a hill in the Rocky Mountains will be much bigger than one in south Florida. You must be able to recognize all the terrain features to locate a point on the ground or to navigate from one point to another.

The five major terrain features are: Hill, Ridge, Valley, Saddle, and Depression.
The three minor terrain features are: Draw, Spur and Cliff.

Terrain features can be learned using the fist or hand to show what each would look like on the ground.

Identify Major / Minor Terrain Features

Hill-a point or small area of high ground. When you are on a hilltop, the ground slopes down in all directions.

Hill Terrain

Ridge-a line of high ground with height variations along its crest. The ridge is not simply a line of hills; all points of the ridge crest are higher than the ground on both sides of the ridge.

Ridge Terrain

Valley-reasonably level ground bordered on the sides by higher ground. A valley may or may not contain a stream course. A valley generally has maneuver room within its confines. Contour lines indicating a valley are U-shaped and tend to parallel a stream before crossing it. The course of the contour line crossing the stream always points upstream.

Valley Terrain

Saddle-a dip or low point along the crest of a ridge. A saddle is not necessarily the lower ground between two hilltops; it may be a break along an otherwise level ridge crest.

Saddle Terrain

Depression-a low point or hole in the ground, surrounded on all sides by higher ground.

Depression Terrain

Identify Minor terrain features

Although these features are not as important as the major terrain features, navigators can plan routes more successfully if they can identify all the terrain features their routes will cross over.

Draw-similar to a valley, except that it normally is a less developed stream course in which there is generally no level ground and, therefore, little or no maneuver room. The ground slopes upward on each side and toward the head of the draw.

Draws are caused by flash floods and can be found on flat terrain but are more often found along the sides of ridges. Contour lines indicating a draw are shaped like a “V” with the point of the “V” toward the head of the draw (high ground).

Draw Terrain

Spur-a usually short, continuously sloping line of higher ground, normally jutting out from the side of a ridge. A spur is often formed by two thoroughly parallel streams cutting draws down the side of a ridge.

Spur Terrain

Cliff-a vertical or near-vertical slope. A cliff may be shown on a map by contour lines being close together, touching, or by a ticked “carrying” contour line. The ticks always point toward lower ground.

Cliff Terrain
 

Position of Attention

a. Assume the position of attention on the command FALL IN or the command Squad (platoon), ATTENTION.

b. To assume this position, bring the heels together sharply on line, with the toes pointing out equally, forming an angle of 45 degrees. Rest the weight of the body evenly on the heels and balls of both feet. Keep the legs straight without locking the knees. Hold the body erect with the hips level, chest lifted and arched, and the shoulders square.

c. Keep the head erect and face straight to the front with the chin drawn in so that alignment of the head and neck is vertical.

d. Let the arms hang straight without stiffness. Curl the fingers so that the tips of the thumbs are alongside and touching the first joint of the forefingers. Keep the thumbs straight along the seams of the trouser leg with the first joint of the fingers touching the trousers.

Position of Attention
 

Parade Rest

Parade rest is commanded only from the position of attention. The command for this movement is Parade, REST. On the command of execution REST, move the left foot about 10 inches to the left of the right foot. Keep the legs straight without locking the knees, resting the weight of the body equally on the heels and balls of the feet. Simultaneously, place the hands at the small of the back and centered on the belt. Keep the fingers of both hands extended and joined, interlocking the thumbs so that the palm of the right hand is outward. Keep the head and eyes as in the position of attention. Remain silent and do not move unless otherwise directed. Stand at ease, at ease, and rest may be executed from this position.

Parade Rest
 

Running & Marching Cadences – Military Cadences

Running Cadences

When I Get To Heaven #2

When I get to Heaven,
Saint Peter’s gonna say
“How’d you earn your livin’?
How’d you earn your pay?”
And I’ll reply with a little bit of anger
“Made my livin’ as an Airborne Ranger.”
Airborne Ranger.
Ranger Danger.
Airborne Ranger.
Black beret danger.
We love to double time.
We do it all the time.

When I get to Heaven,
Saint Peter’s gonna say
“How’d you earn your livin’?
How’d you earn your pay?”
And I’ll reply with a whole lot of anger
“Made my livin’ blood, guts, and danger.”
Blood, guts, danger.
Ranger danger.
Blood, guts, and danger.
Black beret danger.
We love to double time.
We do it all the time.

When My Granny

When my granny was 91 She did PT just for fun
When my granny was 92 She did PT better than you
When my granny was 93 She did PT better than me
When my granny was 94 She did PT more and more
When my granny was 95 She did PT to stay alive
When my granny was 96 She kept on doing flutter-kicks
When my granny was 97 She up and died and went to heaven
She met St. Peter at the pearly gates
Said, “St. Peter, St. Peter, hope I’m not late
St. Peter said with a big ol’ grin
“Get down granny, and knock out ten”
She replied with a big ol’ smile
“Sorry, St. Peter, I’m on profile!”

When that left foot strikes the ground #3

When that left foot hits the ground/
all I wanna hear is that _____ sound. (group sounds off with the sound you designate
on every left.This sound can be any one syllable
sound thatyou choose. Bark sound, What!, Hooah!, etc.
I like to use “WHAT!”) (WHAT!)
We train
(WHAT!)
In the rain
(WHAT!)
We’ll fight
(WHAT!)
Day or night
(WHAT!)
We’ll go
(WHAT!)
Through the snow
(WHAT!)
We’ll run
(WHAT!)
To the sun
(WHAT!)
We’ll run
(WHAT!)
THROUGH the sun
(WHAT!)
Bin Laden
(WHAT!)
You better pray
(WHAT!)
You don’t see my
(WHAT!)
Maroon beret
(WHAT!)
Got that vodka
(WHAT!)
In my wall locker
(WHAT!)
Got that 100 proof
(WHAT!)
Up on the roof
(WHAT!)
Got that cogniac
(WHAT!)
In my alice pack
(WHAT!)
Got covasier
(WHAT!)
in the changing bay
(WHAT!)
Gonna have some fun
(WHAT!)
With that spiced rum NOTE: This cadence can go forever if you are creative. That’s why it’s called freestyle.WARNING: Do not attempt if you have no rythym

When That Left Foot Strikes The Ground #2

when that left foot strikes the ground
all I wanna hear is that “what” sound
what (left foot)
dont get me started
(what)
dont get you started
(what)
dont get us started
(what)
before we get retarded
(what)
that gin n juice
(what)
it gets me loose
(what)
that fifth of vocka
(what)
got it in my locker
(what)
that rum n coke
(what)
will make ya choke
(what)
that glass of milk
(what)
is good as silk
(what)
so dont get me started
(what)
dont get you started
(what)
dont get us started
(what)
before we get retarded.

A-10, A-10 Flyin’ High

A-10, A-10 Flyin’ high,
Drop that napalm from the sky!
See Haji there down by the lake,
Drop that napalm watch him bake!

A-10, A-10 Flyin’ high,
Drop that napalm from the sky!
See that Commie down by the river,
Drop that napalm watch him quiver!

A-10, A-10 Flyin’ high,
Drop that napalm from the sky!
See Charlie there down in the wood,
Drop that napalm boil his blood!

A-10, A-10 Flyin’ high,
Drop that napalm from the sky!
See that Nazi down in the stream,
Drop that napalm hear him scream!

A-10, A-10 Flyin’ high,
Fire your cannon from the sky!
See that pinko-commie red,
Give him 2 in the chest and one in the head!

Bodies bodies bodies

Load another magazine

In my trusty M-16

Cuz all I ever wanna see

Is bodies bodies bodies

Prep another claymore mine

See the light I’m feelin fine

Cuz all I ever wanna see

Is burning chunks of bodies

Draw my rusty bayonet

See the funny looks I get

Cuz all I ever wanna see

Is rotten stinking bodies

Throw some candy on the ground

Watch the children gather round

Cuz all I ever wanna see

Is little bleeding bodies

Chairborne Ranger

It’s one thirty now on the strip
Chairborne daddy gonna take a little trip
Stand up, lock up, shuffle to the door
The club for lunch and home by four
If there’s something to decide
Close your door and try to hide
Every time you get a call
You’re out playing racquetball
First revise the SOP
Make a change in policy
Ours is not to wonder why
It’s written down in the LOI
God forbid we should go to war
All that paperwork would be a bore
Let me stay behind my desk
Anything is better than the leaning rest
Chairborne Ranger, that’s what I am
One of a kind, I’m and AG man

Don’t Fall Out

You say) I don’t know what you come to do.
(platoon say)-I don’t know what you come to do.
(You say)I came to clap my hands
(P)My hands
(Y)I came to stomp my feet
(P)My feet
(Y)I came to rock my head
(P)My head
(Y)Rock it to the the beat
(P)The beat
(Y)I said,don’t fall out
(P)You gota deal with it
(Y)Don’t you fall out
(P)You gota deal with it
(Y)You can’t count to five
(P)You gota deal with it
(Y)Just to stay alive
(P)You gota deal with
(Y)You can’t count to six
(P)You gota deal with it
(Y)PT makes me sick
(P)You gota deal with it
Free style the rest

Fat Boy Fat Boy Why You So Fat?

Fat boy, fat boy, why you so fat?
You weeble wouble, weeble wouble, weeble like that.
Fat boy, fat boy, don’t you know,
They sell Slim Fast at the corner store,
They sell Ex-Lax to help you drop it fast,
and Pepto Bismol tightens up that ass.

Left, Right, Kill (Terrorist Version)

I went to the desert
Where all the terrorists run
I pulled out my machete
and I had a little fun!

Left, right, left, right, left right kill!
You mess with us and you know we will!

I went to the caves
Where all the terrorists hide
I pulled out a grenade
and I threw it inside!

Left, right, left, right, left right, kill!
You mess with us and you know we will!

Momma Told Sally

Momma told told Sally not to go downtown,
Too many Crewchiefs hangin’ around.
Sally got the ass and she went anyway,
She didn’t come home till late the next day.

Three months later, all was well,
Six months later, she began to swell,
Nine months later, out it came,
It was a bald headed Crewchief swingin’ a chain.

Singin’, “I’m Hardcore”
Motivated.

Dedicated.

Combat.

Ready.

Rollin’.

Steady.

We got the right, the right to rock steady,
We got to the right to roll when we’re ready.
But when the time comes I got to be ready,
Willin and able to rock steady.

MP, MP, Don’t Arrest Me

MP, MP, don’t arrest me,
arrest that leg behind the tree,
he stole the whiskey,
I stole the whine,
we did this all at a double time,
cause we’re hardcore,
lean and mean,
hard core,
fighting machines.

Seen An Old Lady

I Seen an old lady walkin down the street
She had a ruck on her back, jump boots on her feet.
I said hey old lady where you goin to
She said US Army Airborne school
I said hey old lady dont you think you’re too old
You better leave that jumpin to the young and the bold
She said hey young punk who you talkin to
I’m a Jumpmaster from Airborne school.
Then I seen an old lady walkin down the street
She had ropes in her hand, jump boots on her feet.
I said hey old lady where you goin to
She sais US Army Air Assault school
I said hey old lady dont you think you’re too old
You better leave that slidin to the young and the bold
She said hey young punk who you talkin to
I’m an instructor from Air Assault school
Then I seen an old lady walkin down the street
She had a tank on her back, and fins on her feet
I said hey old lady where you goin to
She said US Army scuba school
I said hey old lady dont you think you’re too old
You better leave that divin to the young and the bold
She said hey young punk who you talkin to
I’m an instructor from scuba school

You Gotta Deal With It

You can’t bring no smoke
You gotta deal with it!

PT ain’t no joke
You gotta deal with it!

All this doubletime
You gotta deal with it!

Is messing with my mind
You gotta deal with it!

One more mile to go
You gotta deal with it!

I heard that before
You gotta deal with it!

All this doubletime
You gotta deal with it!

Is messing with my mind
You gotta deal with!

Marching Cadences

1-2-3-4 (The Real Way)

1,2,3,4
You can’t count to 5
1,2,3,4
Cause your brains are fried
On crack and dope and all that shit you smoke
Crack baby
Hit em’ on the head with a base ball bat
Oww that hurt
I’ll smack your mama and your girl freind too
say oh, oh, oh, oh, oh
Who,
Who’s your daddy
Who,
Who’s your daddy

Airborne Ranger #3

Their home is Fort Benning
The land that God forgot
The mud is 18 inches deep
The sun is blazing hot

Chorus:Airbooooooooorne Raaaaaaaangers Lead The Way

So walking down the street one day
I met a total stranger
He asked me what I wanted to be
I said an Airborne Ranger

Chorus:Airbooooooooorne Raaaaaaaangers Lead The Way

I’m sitting in my foxhole
Sharpinning my knife
Up jumped the enemy
I had to take his life

Chorus:Airbooooooooorne Raaaaaaaangers Lead The Way

I went to wake up the Sergeant
He was lying in his bed
I went to turn him over
I found out he was dead

Chorus:Airbooooooooorne Raaaaaaaangers Lead The Way

My buddies in a foxhole
With a bullet in his head
The medic said he’s wounded
But I know that he’s dead

Chorus:Airbooooooooorne Raaaaaaaangers Lead The Way

I hear the choppers coming
They’re flying over head
They come to get the wounded
But all they find is dead

Chorus:Airbooooooooorne Raaaaaaaangers Lead The Way

So out in the battle field covered in blood
There lies a ranger dying in the mud

Chorus:Airbooooooooorne Raaaaaaaangers Lead The Way

Airborne, Ranger (shoot shoot shoot shoot to kill)

My buddies in a foxhole,
a bullet to his head,
the medic said hes wounded,
but i know hes dead

airborne, (shoot shoot shoot shoot to kill)
ranger er er eeer

I went to see the 1st SGT,
Hes lying in his bunk,
the medic said hes wounded,
but i know hes drunk

(chorus)
airborne, ranger (shoot shoot to kill)

Airborne Stranger

(to the tune of “I hear the choppers coming”)

I’ll tell you a story

It’s true I swear

About an Airborne Ranger

Who wore ladies’ underwear

Airboooooorne

Strangeeeeeeer

They gave him a mission

They said he must not fail

He landed in the drop zone

And he stopped to do his nails

He put on silk panties

And he put on his brassier

He crept up on the commies

And he took them from the rear

Army Life is not My Style

U o o no
got to leave I got to go
this army life is not my style
It got me looking like Gommer Pyle

U Oh oh no
Shanna na na na hey
this army life is all messed up
it got me looking like Elmer Fud

Use to wear my faded jeans
Now I’m wearing army greens
this army life is not my style
It got me looking like Gommer Pyle

I used to date a beauty queen
Now I date my M- 16
this army life is not my style
it got me looking like gommer pyle

Band of Brothers

Above the land,

Across the sea,

We’re everywhere,

We need to be.

We’re brothers of,

A special kind,

A better band,

You’ll never find.

Band of brothers,

That’s what we are,

Fighting evil,

Near and far.

Band of brothers,

That’s what I said,

Baptized by fire,

Scarred by lead.

We’re lean and mean,

And fit to fight,

Anywhere,

Day or night.

When bullets fly,

And rockets fall,

We’ll stand our ground,

And give our all.

We’re on the move,

We’re on the march,

We’re diggin’ ditches,

And breakin’ starch.

When you hear,

Our battle cry,

You better move,

And step aside.

Band of brothers,

That’s what we said,

Mess with us,

We’ll shoot you dead.

Band of brothers,

Trained to kill,

If we don’t getcha,

Our sisters will.

Blood Upon The Risers

He was just a cherry trooper and he surely shook with fright
as he checked all his equipment and made sure his pack was tight
He had to sit and listen to the awful engines roar,
And he ain’t gonna jump no more.

CHORUS:
Gory, Gory, What a helluva way to die
He ain’t gonna jump no more.

“Is everybody happy?”cried the Sergeant, looking up.
Our hero feebly answered “eyes,” and then they stood him up.
He leaped right out into the blast, his static line unhooked.
He ain’t gonna jump no more.

CHORUS:
Gory, Gory, What a helluva way to die
He ain’t gonna jump no more.

He counted long, he counted loud, he waited for the shock;
He felt the wind, he felt the clouds, he felt the awful drop;
He jerked his cord, the silk spilled out and wrapped around his legs.
He ain’t gonna jump no more.

CHORUS:
Gory, Gory, What a helluva way to die
He ain’t gonna jump no more.

The risers wrapped around his neck, connectors cracked his dome;
The lines were snarled and tied in knots, around his skinny bones;
The canopy became his shroud, he hurtled to the ground.
He ain’t gonna jump no more.

CHORUS:
Gory, Gory, What a helluva way to die
He ain’t gonna jump no more.

The days he’d lived and loved and laughed kept running through his mind;
He thought about the girl back home, the one he’d left behind;
He thought about the medics and wondered what they’ed find.
He ain’t gonna jump no more.

CHORUS:
Gory, Gory, What a helluva way to die
He ain’t gonna jump no more.

The ambulance was on the spot, the jeeps were running wild;
The medics jumped and screamed with glee, they rolled their sleeves and smiled;
For it had been a week or more since last a chute had failed.
He ain’t gonna jump no more.

CHORUS:
Gory, Gory, What a helluva way to die
He ain’t gonna jump no more.

He hit the ground, the sound was splat, his blood went spurting high;
His comrades were then heard to say, “A helluve way to die”;
He lay there rolling around in the welter of his gore.
He ain’t gonna jump no more.

CHORUS:
Gory, Gory, What a helluva way to die
He ain’t gonna jump no more.

There was blood upon the risers, there were brains upon the chute;
Intestines were a-dangling from this paratrooper’s boots;
They picked him up, still in his chute and poured him from his boots.
He ain’t gonna jump no more.

CHORUS:
Gory, Gory, What a helluva way to die
He ain’t gonna jump no more

Coke Count Cadence

Count cadence, coke cadence, count cadence, count!
C!!! in a bottle!
O!!! in a can!!
K!!! wish i had one!!
E!!! in my hand!!
C – drink it
O chug it
K chuck it
E break it down
C-O-K-E, C-O-K-E, a coke, a coke, an icy cold coke

Columbo

In eighteen hundred and ninety four,
in the streets of old Bigotti.
There lived a young Italian lad,
selling hot tomalies.
He said the world was round-o,
he said it could be found-o.
The hypothetical, navigatin’, son-of-a-b**ch (gun) Columbo.

The queen she gave him three tall ships,
they all were triple deckers.
The queen she waved her handkerchief,
Columbo waved his pecker (hand)
He said the the world was round-o,
he said it could be found-o.
That hypothetical, navigatin’, son-of-a-b**ch (gun) Columbo.

His first mate was a cabin boy,
a dirty little nipper.
They lined his bunk with broken glass,
and circumcised the skipper.
He said the world was round-o,
he said it could be found-o.
That hypothetical, navigatin’, son-of-a-b**ch (gun) Columbo.

One by One

One by one, we were havin’ some fun in the desert all day
and all through the night, HEY HEY
Two by two, the Al-Qaeda came through in the desert all day and through
the night, HEY HEY
Three by three, we shot at their knees in the desert all day and all
through the night, HEY HEY
Four by four, we shot em’ some more in the desert all day and all
through the night, HEY HEY
Five by five, no Al-Qaeda alive in the desert all day and all through
the night, HEY HEY
Six by six, we reloaded our clips in the desert all day and all through
the night, HEY HEY
Seven by seven, there’s a 7-11 and it’s open all day and all through
the night, HEY HEY
Eight by eight, all the killin’ was great in the desert all day and all
through the night, HEY HEY
Nine by nine, all the killin’ was fine in the desert all day and all
through the night, HEY HEY
Ten by ten, let’s do it again in the desert all day and all through the
night, HEY HEY

Yellow Bird #2

A yellow bird
witha yellow bill
sat up upon
my windowsill
i lured him in
with a piece of bread
and then i smashed
his yellow head

A little bird
with little feet
sat up upon
my toilet seat
i pused him in
and flused him down
and that little bird
went round and round

A bigger bird
with a bigger bill
sat up upon
my window sill
i lured him in
with a bigger bread
and then i smashed in
his bigger head
the doctor came
and the doctor said
that this big bird
sure aint dead
oh me oh my
I’m such a cluts
i smashed out the birds guts!

Come Along And Join Our Party

Come along and join our party
Come along and have some fun
We’re the soldiers of the U.S. Army
droppin rounds on everyone

Go to town and kill some commies
Throw some napalm on red square
Do it on a Sunday morning
As the people go to prayer

Come along and join our party
Come along and have some fun
We’re the soldiers of the U.S. Army
droppin rounds on everyone

Aiming mortors at the school yard
Watch the teacher ring the bell
Look at all those children crying
As their school yard burns to hell

Come along and join our party
come along and have some fun
We’re the soldiers of the U.S. Army
droppin rounds on everyone

Throw some candy to those children
Watch them as they gather round
Lock and load on your M16
Mow those little suckers down

Come along and join our party
Come along and have some fun
We’re the soldiers of the U.S. Army
droppin rounds on everyone

Everywhere We Go #2 (Navy Version)

Every where we go,
people wanna’ know,
who we are,
and where the hell we come from,
so, we tell them,
we ain’t the Army,
the backpacking Army,
we are the Navy the mighty, mighty Navy.

Every where we go,
people wanna’ know,
who we are,
and where the hell we come from,
so we tell them,
we ain’t the Marines,
they don’t even look mean,
we are the Navy,
the mighty, mighty Navy.

Every where we go,
people wanna’ know,
who we are,
and where the hell we come from,
so we tell them,
we ain’t the Air Force,
the low flyin’ Air Force,
we are the Navy,
the mighty, mighty Navy.

Everywhere we go,
people wanna’ know,
who we are,
and where the hell we come from,
so we tell them,
we ain’t the Coast Guard,
a boat full of retards,
we are the Navy,
the mighty, mighty Navy.

Everywhere We Go (Army Pride Version)

Every where we go,
people wanna’ know,
who we are,
and where the hell we come from,
so we tell them,
we ain’t the Marines,
they don’t even look mean,
we are the Army,
the back-packin’ Army.

Every where we go,
people wanna’ know,
who we are,
and where the hell we come from,
so we tell them,
we ain’t the Air Force,
the low flyin’ Air Force,
we are the Army,
the dedicated Army.

Everywhere we go,
people wanna’ know,
who we are,
and where the hell we come from,
so we tell them,
we ain’t the Coast Guard,
a boat full of retards,
we are the Army,
the rock strong Army.


Hand Salute

a. The hand salute is a one-count movement. The command is Present, ARMS. When wearing headgear with a visor (with or without glasses), on the command of execution ARMS, raise the right hand sharply, fingers and thumb extended and joined, palm facing down, and place the tip of the right forefinger on the rim of the visor slightly to the right of the right eye. The outer edge of the hand is barely canted downward so that neither the back of the hand nor the palm is clearly visible from the front. The hand and wrist are straight, the elbow inclined slightly forward, and the upper arm horizontal

Hand Salute

b. When wearing headgear without a visor (or uncovered) and not wearing glasses, execute the hand salute in the same manner as previously described in subparagraph a, except touch the tip of the right forefinger to the forehead near and slightly to the right of the right eyebrow.

c. When wearing headgear without a visor (or uncovered) and wearing glasses, execute the hand salute in the same manner as described in subparagraph a, except touch the tip of the right forefinger to that point on the glasses where the temple piece of the frame meets the right edge of the right brow.

d. Order arms from the hand salute is a one-count movement. The command is Order, ARMS. On the command of execution ARMS, return the hand sharply to the side, resuming the position of attention.

e. When reporting or rendering courtesy to an individual, turn the head and eyes toward the person addressed and simultaneously salute. In this situation, the actions are executed without command. The salute is initiated by the subordinate at the appropriate time and terminated upon acknowledgment.

f. The hand salute may be executed while marching. When double timing, a soldier must come to quick time before saluting.

NOTE: When a formation is marching at double time, only the individual in charge assumes quick time and salutes.


Facing Movements

Facing to the flank is a two-count movement for turning to one side or the other. The command is “Left, face” or “Right, face.” The Figure below illustrates “left face.” On the command of execution, “Face,” slightly raise yourself 90 degrees to the left on your left heel. A slight pressure on the ball of your right foot will help you do this correctly. Keep your right leg straight, but not stiff. On the second count, place your right foot beside your left foot, and resume the position of attention. Hold your arms as you would while at attention as you execute this movement. Right face will be executed in the very same way as left face, simply substituting right for left and left for right.

Facing to the rear is also a two-count movement and is illustrated in the figure below. The command is “About, face.” On the command of execution, “Face,” touch the toe of your right foot to the ground about half the length of your foot to the rear and slightly left of the left heel. Rest your weight on the heel of your left foot, and allow your right knee to bend naturally. On the second count, turn 180 degrees to the right on the left heel and on the ball of the right foot, resuming the position of attention. Hold your arms at attention when executing this movement.


Military Cadence

Military Cadences

A military cadence is a traditional call-and-response chant that serves to keep soldiers in unison during running or marching exercises. These rhythmic chants, often led by a drill sergeant or unit leader, help maintain the pace and morale of the troops while fostering a sense of camaraderie and teamwork. The cadence usually consists of simple, repetitive phrases that are easy to memorize and synchronize with physical movements. The origins of military cadences date back to the early days of organized armies and have evolved into an integral part of military training and culture.

The primary difference between a running cadence and a marching cadence lies in their tempo and purpose. Running cadences, often called “jodies,” have a faster rhythm designed to match the pace of troops during a run. These cadences typically feature energetic and motivational themes to keep soldiers motivated during physically demanding activities. On the other hand, marching cadences have a slower, more deliberate tempo suited for marching in formation. They focus on maintaining step synchronization and discipline. Each of these cadences reflects the unique spirit and traditions of military life while helping to build unit cohesion and morale. Explore popular cadences below:

Running Cadences

C-130 Rollin’ Down the Strip

C-130 rollin’ down the strip
64 Rangers on a one-way trip
Mission Top Secret, destination unknown
They don’t even know if they’re ever coming home
When my plane gets up so high
Paratroopers take to the skies

Stand up, hook up, shuffle to the door
My knees got weak and I hit the floor
Jumpmaster picked me up with ease
Tossed my knees into the breeze

Count one-thousand, two-thousand, three-thousand, four
My main opened with a mighty roar
But if my main don’t open wide
I got a reserve by my side
But if that one should fail me too
Look out below I’m a-comin’ through

If I die on the old drop zone
Box me up and ship me home
Pin my wings upon my chest
And then bury me in the leaning rest

Well if I die on a Chinese hill
Take my watch or the commies will
But if I die in the Korean mud
Bury me with a case of Bud

Well if I die on a Chinese hill
Take my watch or the commies will
But if I die in the Korean mud
Bury me with a case of Bud

Saw an Old Lady

Saw an old lady running down the street
Had a cute on her back, jump boots on her feet
Said, “Hey old lady where you goin’ to?”
She said “US Army Airborne School”
“Whatcha gonno do when you get there?”
“Jump from a plane, float through the air”
I said “Hey old lady ain’t you been told?
Airborne School’s for the young and the bold”
She said “Hey young punk who you talkin’ to?
I’m an instructor at the Airborne School”

Saw an old lady marching down the road
Had a knife in her hand and a 90lb load
Said, “Hey old lady where you goin’ to?”
She said “US Army Ranger School”
“Whatcha gonna do when you get there?”
“Jump and swim and kill without care”
I said “Hey old lady ain’t you been told?
Ranger School’s for the young and the bold”
She said “Hey young punk who you talkin’ to?
I’m an instructor at the Ranger School”

Saw on old lady running down the track
Had fins on her feet and a tank on her back
Said, “Hey old lady where you goin’ to?”
She said “US Army scuba School”
“Whatcha gonno do when you get there?”
“Swim under water and never breathe air”
I said, “Hey old lady ain’t you been told?
Scuba School’s for the young and the bold”
She said “Hey young punk who you talkin’ to?
I’m an instructor at the Scuba School”

I wanna be an airborne ranger!!!

I wanna be an airborne ranger,
Live the life of guts and danger.

Airborne ranger,
Life of danger.

I wanna be a scuba diver,
Swim around in the muddy water.

Scuba diver, muddy water.
Airborne ranger, life of danger.

I wanna be an S.F. medic,
Shoot some funky anisthetic.

S.F.medic, anesthetic.
Scuba diver, muddy water.
Airborne ranger, guts and danger.

And when I retire.

Im gonna be a texas ranger,
Drive around in sking tight wranglers!

Texas ranger, skin tight wranglers.

Im gonna be a UPS man,
Drive around in a ugly brown van.

Ups man, ugly brown van
Texas ranger, skintight wranglers.

Im gonna be a forrest ranger.
Chipmunks are my greatest danger.

Forrest ranger, chipmunk danger.
UPS man, ugly brown van.
Forrest ranger, chipmunk danger.

Dingle Dangle

Left Left oh right left
left right left
keep it in step
but dont let your dingle dangle dangle in the dirt
pick up your dingle dangle put it in your shirt
left left oh right left
left right left
keep it in step
but dont let your dingle dangle dangle in the mud
pick up your dingle dangle hand it to your bud
left left oh right left
left right left
keep it in step
but dont let your dingle dangle dangle in the snow
pick up your dingle dangle tie it in a bow
left left oh right left
left right left
keep it in step
but dont let your dingle dangle to low
pick up your dingle dangle and lets go
left left oh right left
left right left
keep it in step

Drip Drop, Drippity Drop

The lines in italics are to be called by the soldiers in formation.

The roof started leaking and the rain fell on my head
Drip, drop, drippity drop, drop

I said the roof started leaking and the rain fell on my head
Drip, drop, drippity drop, drop

Well, my baby done left me, I might as well be dead
Drip, drop, drippity drop, drop

Well, I’m sittin’ here drinkin’, thinkin’ what I’m gonna do
Drip, drop, drippity drop, drop

Yeah, I’m sittin’ here drinkin’, thinkin’ what I’m gonna do
Drip, drop, drippity drop, drop

My baby’s gone and left me, I’m feelin’ mighty blue
Drip, drop, drippity drop, drop

Well, I talked to the preacher and he said it was a sin
Drip, drop, drippity drop, drop

Yeah, I talked to the preacher and he said it was a sin
Drip, drop, drippity drop, drop

I guess that’s because my baby ran off with him
Drip, drop, drippity drop, drop

Then I called the C-O and who d’ya think answered his phone
Drip, drop, drippity drop, drop

Yeah, I called up the Captain and who d’ya think answered his phone
Drip, drop, drippity drop, drop

My baby said she’d gone and found herself a brand new home.
Drip, drop, drippity drop, drop

Hey Lodie Dodie

Caller: Hey lodie dodie
Chorus: a hey, hey
caller: hey lodie dodie hey
chorus: a hey, hey
caller: got a letter,in the mail
chorus: a hey, hey
caller: go to war or go to jail
chorus: a hey, hey
caller: hey lodie dodie
chorus: a hey, hey
caller: hey lodie dodie hey
chorus: a hey, hey
caller: use to date a girl name jean
chorus: a hey, hey
caller: now i got an m16
chorus: a hey, hey
Caller: now i’m humpin with a pack
chorus: a hey, hey
caller: use to ware my fadded jeans
chorus: a hey, hey
caller: now i’m waring army greens
chorus: a hey, hey
caller: hey lodie dodie
chorus: a hey, hey
caller: hey lodie dodie hey
chorus: a hey, hey
caller: ham hocks and collard greens
chorus: a hey, hey
caller: makes a soldier really mean
chorus: a hey, hey
caller: if micheal jackson, were here to day
chorus: a hey, hey
caller: here’s the words, that he would say
chorus: a hey, hey
caller: (in a micheal type tone) He,he,he,he,he
chorus: a hey, hey
caller: hey lodie dodie hey
chorus: a hey, hey
caller: hey lodie,hey lodie, hey lodie dodie hey
chorus: a hey, hey
caller: if r kelly were here today
chorus: a hey, hey
caller: here’s the words that he would say
chorus: a hey, hey
caller: i beleive, that i can fly
chorus: a hey, hey
caller:i beleive i can touch the sky.
chorus: a hey, hey
caller: hey lodie,hey lodie, hey lodie dodie hey
chorus: a hey, hey
caller: hey lodie,hey lodie, hey lodie dodie hey

I Got A Yo-Yo

When I was a little one
My momma told me
Go to the store and………
Get what you need
I got me a Yo-Yo
Wound it up tight
Wound it in the morning
Wound it all night
Wound it in the hall
Wound it on the w–all
I said’a who, huh, what, I gotta Yo-Yo!!!

Get yourself a private
Wind him up tight
Smoke him in the morning
Train him all night
Train him in the hall
Train him on the w–all
I said’a who, huh, what, I gotta Yo-Yo!!!

Get yourself a sargent
Wind him up tight
Follow in the morning
Dog him all night
Dog him in the hall
Dog him in the w–all
I said’a who, huh, what, I gotta Yo-Yo!!!

Me And Superman #2

Me and Superman got into a fight;
hit him in the head with Kryptonite.
I hit him so hard that I busted his brain;
and now I’m dating Lois Lane.

Me and Batman had it out too;
I kicked him in the head with my combat boot.
I kicked him in the head with my left boot heal;
and now I’m driving that Bat-Mobile.

Me and the Hulk went blow for blow;
but I like green so I let him go.
And I guess you’ve heard about a guy named Flash;
we raced around the track ’till he puked in the grass.

Rollin’ Rollin’ Rollin”

Rollin’ rollin’ rollin’
Oh my feet are swollen
Don’t let your dingle dangle dangle in the mud
Pickup your dingle dangle, give it to your bud
Rollin’ rollin’ rollin’
Oh my ankles are swollen
Don’t let your dingle dangle dangle in the dirt
Pickup your dingle dangle, put it in your shirt
Rollin’ rollin’ rollin’
Oh my legs are swollen
Don’t let your dingle dangle dangle on the ground
Pickup your dingle dangle, toss it all around
Rollin’ rollin’ rollin’
Oh my knees are swollen
Don’t let your dingle dangle dangle in the track
Pickup your dingle dangle, put it in your pack

The Motivator

(chorus)
YOUR LEFT, YOUR LEFT, YOUR LEFTTT, RIGHTTTT, LEFTTTT

somebody ain’t goin’ make it,
cause their punie little heart can’t take it

(chorus)
YOUR LEFT, YOUR LEFT, YOUR LEFTTT, RIGHTTTT, LEFTTTT

first sgt ain’t goin’ make it,
cause their punie little heart can’t take it

(chorus)
YOUR LEFT, YOUR LEFT, YOUR LEFTTT, RIGHTTTT, LEFTTTT

LT ain’t goin’ make it,
cause their punie little heart can’t take it

Marching Cadences

Airborne Ranger (In Combat) II

My home is Ft. Benning,
The land that time forgo-ot.
The mud is 18 inches deep,
The sun is blazing ho-ot.
(Air,bor,or,or,orn Rang er,er,er-er-er)
Sitting on a hilltop,
Eatin beans & fra-anks.
When all of a sudden,
The bullets start to cra-ank.
(Air,bor,or,or,orn Rang er,er,er-er-er)
Sitting in my foxhole,
My boots are caked with mu-ud.
Look over at my buddy,
His face is caked with blood.
(Air,bor,or,or,orn Rang er,er,er-er-er)
You go to get yer Captain,
You find him in his be-ed.
But when you roll him over,
You find that he’s dead.
(Air,bor,or,or,orn Rang er,er,er-er-er)
You go to get yer Sgt,
You find him in his be-ed.
And when you roll him over,
He slaps you in the head
(Air,bor,or,or,orn Rang er,er,er-er-er)
You hear the choppers coming,
They’re hoverin overhead.
They’ve come to get the wounded,
They’ve come to get the dead.
(Air,bor,or,or,orn Rang er,er,er-er-er)
You see the flag awaivin,
It’s waiving overhead.
It’s waiving for the wounded,
It’s waiving for the dead.
(Air,bor,or,or,orn Rang er,er,er-er-er)

Captain Jack

Hey, hey Captain Jack
Meet me down by the railroad track
With that rifle in my hand
I’m gonna be a shootin’ man
A shootin’ man
The best I can
For Uncle Sam

Hey, hey Captain Jack
Meet me down by the railroad track
With that knife in my hand
I’m gonna be a cuttin’ man
A cuttin’ man
A shootin’ man
The best I can
For Uncle Sam

Hey, hey Captain Jack
Meet me down by the railroad track
With that grenade in my hand
I’m gonna be a killin’ man
A killin’ man
A cuttin’ man
A shootin’ man
The best I can
For Uncle Sam

Hey, hey Captain Jack
Meet me down by the railroad track
With that bottle in my hand
I’m gonna be a drinkin’ man
A drinkin’ man
A killin’ man
A cuttin’ man
A shootin’ man
The best I can
For Uncle Sam

Hey, hey Captain Jack
Meet me down by the railroad track
With that book in my hand
I’m gonna be a studyin’ man
A studyin’ man
A drinkin’ man
A killin’ man
A cuttin’ man
A shootin’ man
The best I can
For Uncle Sam

Down By The River

Down by the river
I took a little walk
Ran into the enemy
We had a little talk

I didn’t like their attitude
Didn’t like the way they walked

So I pushed em
I shoved em
I threw em in the river
laughed as they drowned

We don’t need the enemy
Hangin, hangin, hangin around

(chorus)
Heyyyy, don’t be a fool
Somebody said we we number two
We’re number one

Noooo, not number five
Not number four number three, number two
We’er number one

Hail O’ Hail O’ Infantry

Up in the morning, outta the rack
Greeted at dawn with an early attack
First Sergeant rushes me off to chow
But I dont need it anyhow

Hail O’ Hail O’ Infantry
Queen of battle follow me
An airborne rangers life for me
O’ nothing in this world is free

From a big bird in the sky
All will jump and some will die
Off to battle we will go
To live or die, hell I dont know

Hail O’ Hail O’ Infantry
Queen of battle follow me
An airborne rangers life for me
O’ nothing in this world is free

Early at night its drizzilin’ rain
I am hit and feel no pain
But in my heart I have no fear
Because my ranger God is here

Hail O’ Hail O’ Infantry
Queen of battle follow me
An airborne rangers life for me
O’ nothing in this world is free

The mortars and artillery
The screaming bursts around me
Jagged shrapnel on the fly
Kills my buddy, makes me cry

Hail O’ Hail O’ Infantry
Queen of battle follow me
An airborne rangers life for me
O’ nothing in this world is free

One, Two, Three, Your Left
Hooah
One, Two, Three, Four
AIRBORNE (Loud and thunderous)

Hi, Ho, Lock And Load

Hi ho, lock and load
The engines are running we’re ready to go
To kill the enemy, take control
So early in the morning

M-1s on the hill
The tank commander is ready to kill
He gives the order “fire at will”
So early in the morning

Bradleys are moving slow
You see him stop and raise the TOW
To hit them with that fatal blow
So early in the morning

Apaches fill the sky
The F-16s go zooming by
The enemy is about to die
So early in the morning

Sniper on the ground
He’s moving in without a sound
He locks and loads a single round
So early in the morning

Tracers flying overhead
While the cooks are sleeping in their beds
But they don’t know they’ll soon be dead
So early in the morning

Gas gas don your mask
You pray to god it’s just a test
Cuz if it’s not you’ll shit your pants
So early in the morning

Hi Ho, Lock and Load (Patriot Version)

Hi Ho Lock and Load
The sound of the Radar is loud and bold
14 Echoes are ready to roll
So early, so early, so early in the morning

Outta my rack at a Quarter to Four
The Captain yells We’re Going to War
Grabbed my ruck on my way out the door
So early in the morning

Grabbed my dispatch, grabbed my keys
A Tangos crying on his knees
The tanks are full, we’re heading out
So early, so early, so early in the morning

Emplace the Big Four there and now
The Launchers stuck I don’t know how
All Tangos do is drive and drive
So early in the morning

Prime Powers up, the Radars done
Echoes are out just having fun
The Chock Blocks (Tangos) are digging
The excitements begun
So early in the morning

Finally the launchers up
The fibers in, that’s just plain luck
The ICC is happy now
So early in the morning

Monitor both day and night
Blasting Scuds from left to right
14 Echoes lead the way
So early, so early, so early in the morning

I Hear The Choppers

I hear the choppers coming,
They’re flying overhead.
They’ve come to get the wounded,
They’ve come to get the dead.

(chorus)

My buddy’s in a foxhole,
A bullet in his head,
The medic says he is wounded,
But I know that he’s dead

(chorus)

I ran to tell the CO
About my buddy’s head
But when I got there,
The CO was dead

(chorus)

And now the battle’s over,
and smoke is all around.
We wanted to go home,
But we’re six feet underground.

(chorus)

I Left My Home

Your mother was home when you left *your right!
Your father was home when you left *your right!
your sister was home when you left *your right!
your brother was home when you left *your right!

your mother, your father, your sister, your brother,
the dog, the cat, the fish, the rat, your aunt, your uncle, and both of your cousins, your papa, your granny, the maid, the nanny, they all was home when you left *your right!
And thats the reason you left* your right!

I left my hoooome /for the army/
I left my hoooome/ for the army/
the day I leeeeft/my mama criiied/
she thought that IIII/was gonna diiie/
I left my wiiife/ standin at the dooooor/
she thought that IIIIII/would die at waaaar/
I left my soooooon/ playin in the yaaard/
to see his daddy leeaave/ made him cry so haaaard/
the day I leeeeft/I shook my daddy’s haaand/
He said that IIIIII/ had become a maaaaan/
oowie oowiiieeeee/ oowiie owieeeeeeeee/
oowie oowieeeeeee/ oowie owieeeeeeeeeeeeee/

Johnny

(Chorus) Lowrider lowrider left right left – Singin lowrider lowrider get in step

Mama told Johnny not to go downtown
There were too many airborne recruiters around
But Johnny didn’t listen and he went anyway
He shipped for the Army the very next day

(Chorus)

Johnny had a girl and her name was Carrie
She was happy cuz they planned to marry
But Johnny wanted to live the life of danger
And wear the black beret of the airborne ranger

(Chorus)

Johnny jumped in to Vietnam
Cuz he wanted to kill the Viet Cong
Johnny jumped on a hand grenade
To save the lives of the friends he made

(Chorus)

Now Johnny didn’t know it but he was a father
He gave his son the Medal of Honor
Johnny came home in a flag drapped coffin
The bugle was playin and the tears were droppin

Ol’ King Cole

Old King Cole was a merry old soul,
a merry old soul was he.
He called for his pipe and he called for his bowl and he called for his Privates three.
Beer! Beer! Beer! Said the Privates.

(Chorus)
What merry men are we!
but none so fair that we can compare to the Airborne Infantry!

Old King Cole was a merry old soul,
a merry old soul was he.
He called for his pipe and he called for his bowl and he called for his Corporals three.
I need a three day pass said the Corporal
Beer! Beer! Beer! Said the Privates.

(chorus)

Old King Cole was a merry old soul,
a merry old soul was he.
He called for his pipe and he called for his bowl and he called for his Sergeants three.
Left right left said the Sergeant.
I need a three day pass said the Corporal
Beer! Beer! Beer! Said the Privates.

(Chorus)

Old King Cole was a merry old soul,
a merry old soul was he.
He called for his pipe and he called for his bowl and he called for his El Tee’s three.
What do I do now? Said the El Tee.
Left right left said the Sergeant.
I need a three day pass said the Corporal
Beer! Beer! Beer! Said the Privates.

(Chorus)

Old King Cole was a merry old soul,
a merry old soul was he.
He called for his pipe and he called for his bowl and he called for his Captains three.
Who’s gonna drive my Hummer? Said the Captain
What do I do now? Said the El Tee.
Left right left said the Sergeant.
I need a three day pass said the Corporal
Beer! Beer! Beer! Said the Privates.

(Chorus)

Old King Cole was a merry old soul,
a merry old soul was he.
He called for his pipe and he called for his bowl and he called for his Majors three.
I need a bigger desk said the major.
Who’s gonna drive my Hummer? Said the Captain
What do I do now? Said the El Tee.
Left right left said the Sergeant.
I need a three day pass said the Corporal
Beer! Beer! Beer! Said the Privates.

(Chorus)

Old King Cole was a merry old soul,
a merry old soul was he.
He called for his pipe and he called for his bowl and he called for his Colonels three.
When can I play golf? Said the Colonel.
I need a bigger desk said the major.
Who’s gonna drive my Hummer? Said the Captain.
What do I do now? Said the El Tee.
Left right left said the Sergeant.
I need a three day pass said the Corporal
Beer! Beer! Beer! Said the Privates.

(Chorus)

Old King Cole was a merry old soul,
a merry old soul was he.
He called for his pipe and he called for his bowl and he called for his Generals three.
Keep those Privates straight! Said the Generals
When can I play golf? Said the Colonel.
I need a bigger desk said the major.
Who’s gonna drive my Hummer? Said the Captain.
What do I do now? Said the El Tee.
Left right left said the Sergeant.
I need a three day pass said the Corporal
Beer! Beer! Beer! Said the Privates.

(chorus)
(chorus)


Surviving Basic Training: The Dreaded Red Phase

Since the recent release of my book, The Ultimate Basic Training Guidebook, I have had countless e-mails from new recruits asking me if I am a recruiter. If you read my book, it will be obvious that I am not. Recruiters, although honest, will tend to paint a more upbeat picture of basic training. I do not. I will tell anyone that basic training is tough, but it is much easier if you are prepared, hence the reason I wrote the book. This article, part of an ongoing series, will provide some more tips (I am betting your recruiter did not tell you) on how to survive basic training.

Basic training can be divided into three phases: the Red Phase, the White Phase and the Blue Phase. The Red Phase has many nicknames, none of which are pleasant. It also happens to be the hardest phase.

During the Red Phase, which lasts 2 weeks, you will begin the process of becoming a soldier. This is known as the hardest phase only because you are in a new environment. In actuality, it will be your easiest phase physically. You will get acquainted with your morning fitness routine, which actually gets harder as basic training progresses. Also, you will not have any long road marches in the Red Phase. Many will not be able to make the mental adjustment from civilian to soldier — however, with a few key pointers, the Red Phase will be over before you know it.

First and foremost, understand that the Red Phase is all about failure. Your platoon will fail at just about every order given to you during this time. Now read that last sentence again.

Don’t go into basic training thinking you are going to impress everyone with how fit you are and how well you pay attention, because it doesn’t matter in the Red Phase. The purpose of the Red Phase is to break down your civilian attitude and realize that in order to accomplish the tasks your drill sergeant gives you, you will have to work in a team. In order to break you down, your drill sergeants will purposefully give your platoon tasks that they cannot possible accomplish. Why would your drill sergeants do this?

The reason is simple and important: With failure comes learned knowledge. Think of it like this: let’s say you want to open a lemonade stand. You get all your equipment ready and open up your shop. Customers buy your lemonade, but you notice after a while that you’re not getting repeat business. After asking around, you discover that people think your lemonade is too sweet. After adjusting your recipe, your sales skyrocket. That first failed recipe taught you what kind of lemonade people like. So during the Red Phase, don’t get mad when you fail. Try your hardest, but expect to fail.

Another great tip to surviving the Red Phase would be to establish your personality. The Red Phase is where you’re judged the most by other members of your platoon. Be sure to make that extra effort to help people out. Also, try to see if any of your fellow members are having a particularly tough time, and make an effort to alleviate their stress. A little attention in the Red Phase goes a long way. You can never have enough friends in basic training.

Lastly, speak with confidence. When you are asked to say something to your drill sergeant, say it with confidence even if you’re not confident about your answer. Speak loud, firm and with motivation. Your drill sergeants will notice, trust me. Drill sergeants like to pick on recruits who aren’t confident.

If you have a particular topic regarding basic training that you would like me to address, please e-mail at [email protected]

——————

Mike Volkin is the author of the Ultimate Basic Training Guidebook, available here.


U.S. Army Board Preparation Guide

Introduction
If you are scheduled to appear before a Soldier/NCO board or a promotion board, you should know that the competition will be intense. The good news is that, since you have been selected you are considered to be one of the best soldiers in your troop or company. Regardless of which type of board you are going to attend, this guide will help you arrange your preparation.

  1. REVIEW YOUR RECORDS
    You should schedule a records review at least 21 days prior to your board appearance. Your Official Military Personnel File (OMPF) is available to you online if you have an Army Knowledge Online (AKO) account. The items you will need to check are: correspondence course completion documentation, military and civilian course/school certification, awards, duty positions, assignments, time in service, time in grade, letters, etc. It’s a good idea to maintain a paper copy of your personal records. Bring this documentation to the record review. At the records review examine your DA Forms 2A and 2-1, Military Personnel Records Jacket (MPRJ), to ensure your information is correct and/or updated.
    Note for sergeants seeking promotion to staff sergeant; Sergeants should understand promotion board members are generally instructed to pay close attention to special and additional duty assignments. Boards are also tasked to consider evidence of a sergeant’s initiative and performance in leadership positions and/or in jobs with increasing levels of responsibility. The NCOER is the primary document the board will use to determine leadership potential. Sergeants should always pay close attention to their NCOER and other documentation to ensure their duty performance is properly recorded. Remember board members are looking for NCOs who can lead effectively, not simply meet requirements.
  2. STUDY AND PREPARATION
    1. Obtain a study guide. The purpose of a study guide is to make you aware of the type of questions that board members may ask and to put the material in a “user friendly” format for study. The questions in any study guide should not be considered to be the only questions a board will ask. Some units provide a basic study guide for their soldiers. Study guides can also be purchased at the PX. One excellent study resource is the Education Connection. This is a free and very comprehensive online study guide.
    2. Seek counsel; other soldiers in your unit who have previously been to “the board” can provide you with a wealth of valuable information. They will be able to tell you about the process, the types of questions asked and their views on what the board members are looking for. Additionally, they can participate in a mock board to help you prepare yourself (see mock boards). Knowing what to expect can help to ease your nerves and prevent you from being surprised by unexpected questions and situations.
    3. Know your unit’s history, meaning of the unit crest and the unit’s current mission.
    4. If being considered for promotion, know the MOS and skill level that you are being recommended for. Be familiar with the Soldier’s Manual and be proficient in the duties required of that skill level.
    5. Be prepared to express yourself on current events (world and national and local level). Pay close attention to news programs and read the daily newspaper at least a week prior to, and up to the date of the board.
  3. UNIFORM
    1. Ensure your uniform is in accordance with AR 670-1(AR 670-1 and most common Army Regulations can be found on line). Check the fit and location of sewn-on items to ensure that they are in compliance. Common uniform deficiencies are: poorly placed or frayed rank insignia and unit patch, sleeves or pant legs that are too long or short, or a coat that is too tight. Once uniform deficiencies are identified, send your uniform in for alterations and cleaning as soon as possible. If you are planning on attending future Soldier/NCO boards it could be worthwhile to purchase a polyester class A uniform. This uniform presents an outstanding appearance and will set you apart from your peers.
    2. Awards and decorations: Set up your uniform in accordance with AR 670-1. Use a ruler to check placement of awards and decorations. All authorized awards and decorations should be clean, and be properly positioned on the uniform. Brass must be of the authorized type, highly shined, and correctly positioned. The name tag must be in accordance with the regulation and properly positioned on the uniform. Check that the unit crests are clean and properly positioned. If any items are scratched, faded, worn, discolored or dirty, replace them. Remove loose threads. Double-check the precedence for your awards. You may want to ask your supervisor or platoon sergeant to inspect your uniform. Once you are sure everything is correct, place it in a garment bag or cover until you are ready to put it on for the board.
    3. Class A shirt and tie: Check to ensure that your shirt collar is clean and fits properly. A common mistake is to wear a shirt that is too tight or too loose in the neck. To determine the proper collar size; measure around your neck just above your collar bone, leaving 1 to 2 fingers between the tape and your neck, and round up to the nearest 1/2 inch. Ensure your tie is clean and pressed (a clip-on tie is not recommended).
    4. Footgear: must be in good repair and highly shined to include the edge of shoes and soles painted with sole dressing. Also, ensure shoes are properly laced, not cracked, and heels are not worn down.
    5. ID and head gear: Make sure you have your military ID card and that your ID tags are on a double chain and are around your neck. Check that the head gear is clean and the unit crest is properly positioned.
    6. Grooming: Prior to the board, get a fresh haircut and ensure sideburns and mustache are properly trimmed and in accordance with current Army policy. Ensure all jewelry is in accordance with current Army policy as well. It is advisable to limit jewelry to a wristwatch (and wedding band if married).
  4. ORAL EXPRESSION, CONVERSATION SKILLS, and BOARD INTERACTION
    1. During a board appearance your ability to articulate your knowledge and opinions is a combination of good preparation and your vocabulary. Board members will prefer an individual who is comfortable within their own vocabulary level over a soldier who is always searching for word at the level above. Bottom line, speak normally and don’t try to use unfamiliar words to depict your thoughts and answers to questions.
    2. Opening Statement; the truth about board interviewing is that it is weighed heavily toward first impressions; therefore the opening statement is very important. Most boards require or will entertain an opening statement.
    3. An opening statement will take some time to put together and should include positions held, jobs performed, military and civilian education, duty stations, significant accomplishments, and future goals. The opening statement should be written and organized into three parts as follows:
      1. Part one is a summary of your career to date (one to two sentences). In other words, your career needs to be condensed into a couple of concise sentences that encapsulates the most important aspects of your career. You may start with where you entered the service, and continue to your current assignment (dates are not important). For example; “Sergeant Major, I have an opening statement” …”I enlisted in the Army in Fort Worth, Texas, attended 19K OSUT at Fort Knox, Kentucky , I am currently assigned to A Company 1/63 Armor.”
      2. Part two should be a summary of your accomplishment(s) (one to three sentences). These should be things that you are proud of and that you feel will also capture the attention of the board members. The accomplishment(s) you chose should be easily explained, and clearly highlight the achievement. When stated correctly board members will want to inquire further, thus giving you an opportunity to further discuss your significant achievements. For example; “During OSUT, I served as the Platoon Guide of the honor platoon. I was selected as an Excellence in Armor soldier………………..”
      3. Part three is a summary of what you plan to do next in your career (one to three sentences). The third part may be more difficult to develop because an Army career typically spans a period of twenty plus years. This part needs to specifically address what you want to do next as well as briefly mention the highpoints of what you would like to achieve over the out years of your career. For example: “My short-term goals are to; achieve the promotion to Sergeant, and graduate PLDC with honors. My intermediate goals are to obtain a Bachelor’s Degree in American History, Promotion to Staff Sgt, and attend and graduate the Master Gunner Course. My long-term goal is to retire from the Army as a Command Sergeant Major.”
      4. After you have the opening statement written in a draft form, ask your supervisor to review it for content and to suggest possible revisions.
      5. Once you have the opening statement completed, practice reciting the statement until you are comfortable with it. Also, think about how you would expand on each point if asked to do so. When giving your opening statement to the board, remember to address the president of the board first, and at least once, look directly at all board members during your statement. If you adequately practice the opening statement it should help you feel relaxed and comfortable with the board process, and get you off to a good start.
    4. Inappropriate Language: Make sure your grammar is professional and “watch your mouth”. Many soldiers get in a stressful situation and can only express themselves with the use of profanity. Needless to say, this will not make a good impression during your board appearance. If you have this problem, you need to know that you can limit or even eliminate profanity from your conversations. One way you can do this is to ask peers and family members to remind you when you say a profane word. Once you become aware of the habit you can effectively change it. It will take an average of 30 days to completely get rid of profanity from your speech.
  5. STANDARD PROCEDURES FOR APPEARING BEFORE THE BOARD AND INTERACTING WITH BOARD MEMBERS
    1. Reporting to the Board: Knock loudly on the door of the board room and enter when told to do so. Approach the president of the board using proper facing movements and position yourself in front of the president of the board. Halt at attention, render a hand salute, and report to the president of the board. Example: “Sir,/Ma’am” or “Sergeant Major, Specialist (Smith) reports”. Hold your salute until the president returns it.
    2. If asked to be seated, look over your shoulder, step to the rear with your left foot, and be seated. While seated, sit straight with both feet flat on the floor and approximately one foot apart. Place your hands comfortably on your thighs.
    3. Opening statement: When you begin your opening statement address the president of the board, looking directly at him. At some point during the statement remember to also look directly at all board members.
    4. Begin all statements to the board members by rank (“Sergeant Major,” “First Sergeant,” “Sergeant,” or with whatever salutation is appropriate). Direct your answer to the person asking the question, maintaining eye-to-eye contact at all times. Speak loudly enough so that all board members will hear you. If you feel your voice start to waiver because of nervousness, take a breath and raise your voice slightly this will usually help to steady it.
    5. Answering board member’s questions.
      1. When answering questions; Use a natural tone and don’t deviate from your normal speaking rate. Don’t mumble or begin your reply with “uh”, “well”, “I think”, or “I believe”. This indicates indecisiveness. Whatever you do, don’t continually reach for unfamiliar words to perfectly portray your thoughts and answers to questions.
      2. It is helpful and impressive to repeat the question as part of your answer. For example, “Sergeant, the five colors of a topographical map are…” If you answer a question and the board member asks you “are you sure?” he or she is probably trying to see if you are indecisive and will change your answer. The best thing to do is to pause and think for a second, and then give your reply. If you think you have actually given the wrong answer, simply restate the members rank and reply with the corrected answer. Conversely, if you are confident in your original answer, state the members rank and “yes”. Also, if a member responses to your answer with a follow-up probing question like “what do you mean?” or “can you explain that in depth?” they are just trying to see if you really know something about the subject or if you have just memorized answers from a study guide.
      3. More that likely there will be some questions you will not know the answer to. Remember, if you don’t know the answer say so! Example: “Sergeant, I do not know the answer to that question” or “Sergeant, I don’t know the answer to that question, but I know the answer can be found in (give the appropriate AR, FM, TM etc.).” Also, never say “I’m sorry” when you find yourself unable to answer a question. Sometimes you may be unable to answer a particular question simply because you have never been in such a situation, if so say so. Of course if you don’t understand the question, you can ask the board member to please repeat or rephrase it.
      4. When asked your opinion, be sure you respond with your opinion (not what you think they want to hear). Board members do not penalize you for an opinion they do not agree with. They only want to evaluate your knowledge, and ability to intelligently present an opinion.
      5. Departing the Board: Come to attention in front of the board president (if seated, stand and take a half step forward first). Render a hand salute to the president of the board and hold your salute until it has been returned. Leave the room using proper facing movements and close the door unless directed otherwise.
  6. MOCK BOARDS (practice boards)
    1. Mock boards are a tremendously efficient way closely replicate the actual board experience, and therefore push your confidence up to the next level. Mock boards are used to help you work through your anxiety and become more confident and comfortable in the dialogue.
    2. Mock board composition. Members of a mock board can be members of your platoon, and/or other personnel from your unit that have experience in this area. They will role play and ask the kinds of questions you can expect to encounter on the board. During the mock board you will respond to the questions as if it is an actual board appearance.
    3. After you have completed the mock board, the members should offer you feedback on how you performed. Members should critique your body language, overall image, as well as your answer content. Their feedback should provide you with an objective measure of your level of discussion performance. For example, maybe you are not making enough eye contact or you tap your foot when you answer the questions. After you become more confident, most of your nervous gestures begin to disappear. It is a good idea to do at least one session in the uniform you will wear on the day of the actual board. That way the mock board members can also provide you with a full critique of your overall appearance.
    4. Mock boards should be conducted in accordance with the standard procedures outlined in the following steps:
      1. Convene a Mock board consisting of at least three voting members and one nonvoting member (the recorder). The President of the Board is the senior member (role play an officer or senior enlisted). For mock promotion boards, all members of the board must role play at least one grade senior to those being considered for promotion (For example, for an E-5 promotion board, all of the members must role play an E-6 or above).
      2. Each mock board member will be assigned at least one subject area. Members will ask a series of questions pertaining to that area. Questions can be obtained from: study guides, TMs, FMs, Soldier’s Manuals, Army Regulations and/or from the U.S Army Board Study Guide (www.armystudyguide.com):Board evaluation subject areas:
        * Personal appearance
        * Oral Expression and conversation skills
        * Knowledge of world and local affairs and current events
        * Awareness of military programs
        * Overall soldier knowledge (MOS Soldier’s Manual, basic soldier knowledge, etc.)
        * Soldier’s attitude
      3. Members will take notes and subsequently provide constructive feed back to the board interviewee.
 

The Operation Order – OPORD

Task Organization: States how the unit is organized for the operation and gives who is the main effort. The leader sufficiently weighs the main effort for each mission (for example, machine guns and antiarmor weapons) to ensure success.

I. Situation: Provides information essential to subordinate leader’s understanding of the situation.

A. Enemy Forces

1. Weather and light data general forecast for the length of the operation: temperature (high & low), sunrise, sunset, moonrise, moonset, moon phase, % illumination, wind speed, wind direction, BMNT, EENT.

Note: You must focus on the effects of weather on military operations rather than the factors that make up the analysis. That is, how does it effect you and your troops on this mission? These types of evaluations are more readily usable by your troops than statements such as “…3 inches of rain over the next 24 to 48 hours…”

2. Terrain: use the acronym OCOKA to analyze terrain

3. Identification of enemy forces (composition). (is he armored, mechanized, motorized, or light? what does that mean to the operation?)

4. Location(s): Known and suspected (disposition). (give grids or relative locations such as 2 KMs to the north)

5. Activity. (is he attacking, retreating, defending, patrolling, etc. ?)

6. Strength(squad, platoon, or company strength), morale (hi or low?), equipment (crew-served weapons, machine guns, anti-tank weapons?) and capabilities (They are capable of reinforcing with a platoon in 30 minutes)

7. Probable course(s) of action when contacted (Will they fight, disperse, retreat, attack?)

B. Friendly Forces

1. Mission and concept of next higher unit (from his paragraph 2) to include higher leader’s intent (from his paragraph 3)

2. Location and planned actions of units to the left, right, front, and rear (from higher leader’s Tasks to Maneuver Units in paragraph 3). State how such actions influence your unit, particularly adjacent unit patrols. Point out their locations on the terrain model

3. Units providing fire support:

List the fire support mean available to your unit: company or battalion mortars, artillery, CAS (Close Air Support), Naval Gunfire, etc.

C. Attachments/Detachments

Attachment: Anyone not normally a part of your unit that is attached for the mission.
Detachment: Anyone normally part of your unit that is not going on the mission for some reason.

II. Mission

This is a clear, concise statement of the unit’s task(s) to be accomplished and the purpose for doing it (who, what, when, where, why, and how). The mission is always stated twice in full. When you give WHEN it’s best to give an actual clock hard time (i.e., NLT 1030 hrs. rather than NLT 50 minutes from now)

III. Execution

Intent

A stated vision that defines the purpose of an operation and the end state with respect to the relationship among the force, the enemy, and the terrain. It affords the subordinates the ability to accomplish the mission in the absence of additional guidance, orders, or communication.

A. Concept of the Operation: This paragraph describes, in general terms, how the unit will accomplish its task(s) from start to finish. It should identify all mission essential tasks, the decisive points of action, and the main effort. This paragraph should be no longer that six sentences.

Here is where you tell a quick, general story about how you envision the mission step-by-step from the AA (assembly area), to the ORP (objective rally point), then to the OBJ (objective), and back to the ORP.

example:
We will move out of the AA on a 190 degree azimuth for 50m in a team wedge, squad in column, in traveling formation to the line of departure. After moving 150m past the Line of Departure, we will conduct a 3 min listening halt. After which, we will move on a 190 degree azimuth for 500m where we will establish our ORP, during movement we will establish rally points every 100m. We have one linear danger area which we will cross as per our SOP. We will halt the squad at the tentative ORP location near this hill (pointing to the terrain model) then I will Look for a suitable ORP (remember: cover and concealed, defendable, off of key terrain, and off the natural line of drift–sometimes you will only be able to find one or two of these characteristics on the STX lane, but be aware). Then we will occupy the ORP by force. I will issue my 5 point contingency plan (GOTWA). Then I will go forward with the bravo team leader and two security (Jones and Smith) to pin point the OBJ to confirm the plan and establish surveillance (leaving a GOTWA). Then I will return to the ORP together the Assault and Support teams. After actions on the OBJ, we will withdraw to the ORP, gather our rucks, and I will call a SALUTE and ACE report to higher. The we will move on a 270 degree azimuth for 500 meters where we will establish a cigar shaped perimeter and disseminate information gained during the mission.

1. Maneuver:

This paragraph addresses, in detail, the mechanics of the operation. The main effort must be designated. All subordinate units (such as assault, support, R & S) with their tasks, related to the main effort, are identified also. Actions on the objective should comprise most of the paragraph. This paragraph covers, in excruciating detail, actions from leaving the ORP to the OBJ and back to the ORP.

Example:
After I return from the leader’s recon, I’ll take the squad forward to the release point. After checking in with the surveillance team to insure nothing has changed on the objective, Bravo team, who is the support element, will break off and move into position, here (point on the terrain model). I will take alpha team who the assault team and also the main effort and emplace them in their attack position, here (point on the terrain model). There we will camouflage our positions and emplace the claymore mine here (point on the terrain model). When an enemy squad moves into the kill zone, I will initiate the ambush with the claymore, and then the entire squad will fire into the kill zone for 45 seconds. After the time is up, I will give the signal for the support element to shift fire by throwing green smoke between the attack position and the objective. At this time the RTO who is the recorder and the timekeeper will start his watch. On my one long whistle blast, Alpha team will then assault, staying in their respective lanes, all the way through the objective, kicking aside weapons as they go. Alpha team will set up a limit of advance here (point on the terrain model). Once the LOA has been established, I will signal bravo team with two whistle blasts to come down and join alpha on the objective. Once bravo arrives and sets up between 9 and 12, with alpha pulling security from 12 to 3, I will call for special teams. Aid and litter teams take priority and they will drag all friendly wounded back to the casualty collection point here (point on the terrain model) on the near side of the objective. Then I will call out the EPW teams to process any enemy dead or survivors, and consolidate them at the EPW collection point here (point on the terrain model). throughout this time, the recorder will call out how long we have been on the objective every 30 seconds. Once all the equipment has been consolidated in the center of the objective here (point on the terrain model) by the EPW teams, I will call for the demo team to emplace their charges. I will give the codeword “red” whereupon aid and litter plus any casualties will withdrawal. On the next codeword “white” the assault element – alpha team – will withdraw. On the third “blue” the support element – bravo team – will withdraw and the demo team will light the fuse and withdraw as well. All elements will move back through the release point to the ORP.

2. Fires:

This paragraph describes how the leader intends for the fires to support his maneuver. It states the purpose to be achieved from the fires, priority of fires, allocation of any priority targets, and any restrictive control measures for the fires. This is also where you give the target number, the grid, the description to each target you have planned.

B. Tasks to Maneuver Units

Cover special teams in this area. Go over the names of the people on the team and task and purpose for each team: assault, support, security, R&S, EPW(Enemy Prisoner of War), Aid and Litter, Demolition, surveillance. Also detail your instructions to individuals such as primary / alternate paceman and primary / alternate compassman.

C. Tasks to Combat Support Units

This paragraph is similar to paragraph III.B except that it describes how combat support units will be employed.

D. Coordinating Instructions This paragraph lists the details of coordination and control applicable to two or more units/sub-units. Items that might be addressed include:

1. Order of movement, formations, and movement techniques. Use a sketch/terrain model

2. Actions at halts (short/long). – SOP

3. Routes (primary/alternate). – Give the hard azimuth and distance

4. Departure and reentry of friendly lines.

5. Rally points and actions at rally points (specify either IRP(initial rally point), ORP, PB (patrol base), or RRP(re-entry rally point) and include grid coordinates and/or terrain references).

6. Actions at danger areas (other than unit SOPs).

7. Actions on enemy contact (other than unit SOPs).

8. Reorganization and consolidation instructions (other than unit SOPs).

9. Fire distribution measures: point fires vs. area fires for all weapons systems (M16, M249, M60, etc.)

10. Fire control measures: cover what you want them to shoot at in order (i.e. crew served weapons then radio operators, then leaders), sectors of fire to include TRPs (target reference points), visual/sound signals.

11. MOPP levels.

12. Troop safety and operational exposure guidance.

13. Time schedules (rehearsals, backbriefs, inspections, movement). Give who must be there, when, where, and what you’ll rehearse (actions on the objective are priority!)

14. Priority Intelligence Requirements (PIR).

15. Debriefing requirements.

16. Reports. When do you want to get ACE and SALUTE reports? (after all contact with the enemy)

17. Rules of Engagement (ROE). When to start shooting. If you are in an ambush, do you shoot at one soldier walking down the road alone? do you engage a battalion going along the road with your squad?

IV. Service Support

This paragraph supplies the critical logistical information required to sustain the unit during the operation.

A. General

  1. SOPs in effect for sustainment operations.
  2. Current and proposed trains/resupply/cache points.
  3. Casualty and damaged equipment. CCPs (casualty collection points), location of the medevac PZ (Pickup Zone)
  4. Special instructions for medical personnel. (triage requirements, 9-line medevac procedures)

B. Material and Services

1. Supply:

a. Class I: Subsistence. (Food and water)
b. Class II: Clothing and individual equipment.
c. Class III: POL.
d. Class IV: Construction.
e. Class V: Ammunition.
f. Class VI: Personal Demand Items.
g. Class VII: Major End Items. (special items – which go with what team – i.e. claymores go with the assault team)
h. Class VIII: Medical.
i. Class IX: Repair parts.
j. Class X: Agriculture/Economic Development.
k. Distribution Methods. (platoon sergeant, squad leaders, team leaders)

2. Transportation.
3. Services (laundry, showers, etc.).
4. Maintenance (weapons, equipment, vehicles). Priority of work and the plan to maintain equipment.

C. Medical Evacuation:

Method of evacuating dead and wounded personnel, friendly and enemy (to include priorities). Discuss enemy dead/ wounded and friendly dead/ wounded. will they be medevaced, carried, or (in the case of enemy) left where they are?

D. Personnel:

Method of handling EPWs and designation of EPW collection point.

E. Miscellaneous:

Special equipment. What does the unit have that is special equipment to accomplish the mission (i.e. claymore mine in an ambush)
Captured equipment. What to do with captured equipment (usually destroy it unless it is strange or unique, in which case you take it with you or if it can’t be moved, make a sketch of it and destroy it)
V. Command & Signal

This paragraph states where command and control elements are located during the operation.

A. Command

  1. Location of the higher unit commander and CP (get this from your higher leader’s paragraph 5)
  2. Location of key personnel and type CP during all phases of the operation. during movement, at the ORP, and on the objective.
  3. Succession of Command. (give this down to the last person in a squad element by name)
  4. Adjustments to the unit SOP.

B. Signal

  1. SOI index in effect (frequencies, call signs).
  2. Method of communication by priority (usually FM and then runner)
  3. Pyrotechnics and signals, to include arm and hand signals (go over all important signals like lift/shift fire, assault onto the OBJ, withdraw from OBJ, etc.)
  4. Codewords (like red, white, and blue in the example in paragraph 3)
  5. Challenge and password (behind friendly lines)
  6. Number combination (forward of friendly lines)
  7. Running password.
  8. Recognition signals (near/far, day/night).
  9. Special instructions for RTOs. ( you are in charge of all commo. monitor the radio continuously, remind me about reports that are due to higher, you are the enroute recorder and the recorder / timekeeper on the objective)
 

Troop leading procedures

Step 1. Receive the Mission
Step 2. Issue a warning order
Step 3. Make a tentative plan
Step 4. Start necessary movement
Step 5. Reconnoiter
Step 6. Complete the plan
Step 7. Issue the complete order
Step 8. Supervise

1. Receive the Mission

The leader may receive the mission in a warning order, an operation order (OPORD), or a fragmentary order (FRAGO). He immediately begins to analyze it using the factors of METT-T:

What is the MISSION?
What is known about the ENEMY?
How will TERRAIN and weather affect the operation?
What TROOPS are available?
How much TIME is available?

(1) The leader should use no more than one third of the available time for his own planning and for issuing his operation order. The remaining two thirds is for subordinates to plan and prepare for the operation. Leaders should also consider other factors such as available daylight and travel time to and from orders and rehearsals. In the offense, the leader has one third of the time from his receipt of the mission to the unit’s LD time. In the defense, he has one third of the time from mission receipt to the time the squad or platoon must be prepared to defend.

(2) In scheduling preparation activities, the leader should work backwards from the LD or defend time. This is reverse planning. He must allow enough time for the completion of each task.

2. Issue a warning order

The leader provides initial instructions in a warning order. The warning order contains enough information to begin preparation as soon as possible. Platoon SOPs should prescribe who will attend all warning orders and the actions they must take upon receipt: for example, drawing ammunition, rations and water, and checking communications equipment.

The warning order has no specific format. One technique is to use the five-paragraph OPORD format. The leader issues the warning order with all the information he has available at the time. He provides updates as often as necessary. The leader never waits for information to fill a format.

If available, the following information may be included in a warning order.

The mission or nature of the operation.
Who is participating in the operation.
Time of the operation.
Time and place for issuance of the operation order.

3. Make a tentative plan

The leader develops an estimate of the situation to use as the basis for his tentative plan. The estimate is the military decision making process. It consists of five steps:

1. Detailed mission analysis
2. Situation analysis and course of action development
3. Analysis of each course of action
4. Comparison of each course of action
5. Decision.

The decision represents the tentative plan. The leader updates the estimate continuously and refines his plan accordingly. He uses this plan as the start point for coordination, reconnaissance, task organization (if required), and movement instructions. He works through this problem solving sequence in as much detail as time available allows. As the basis of his estimate, the leader considers the factors of METT-T.

4. Start the necessary movement

The platoon may need to begin movement while the leader is still planning or forward reconnoitering. The platoon sergeant or a squad leader may bring the platoon forward, usually under the control of the company executive officer or first sergeant.

This is where your subordinate leaders prepare men, weapons and equipment for the coming mission. It is an excellent time for them to eat, conduct maintenance on weapons/equipment, and gather together anything they are going to need for the upcoming mission.

This step could occur at any time during the troop-leading procedure.

5. Reconnoiter

If time allows, the leader makes a personal reconnaissance to verify his terrain analysis, adjust his plan, confirm the usability of routes, and time any critical movements. When time does not allow, the leader must make a map reconnaissance. The leader must consider the risk inherent in conducting reconnaissance forward of friendly lines. Sometimes the leader must rely on others (for example, scouts) to conduct the reconnaissance if the risk of contact with the enemy is high.

6. Complete the plan

The leader completes his plan based on the reconnaissance and any changes in the situation. He should review his mission, as he received it from his commander, to ensure that his plan meets the requirements of the mission and stays within the framework of the commander’s intent.

7. Issue the complete order

Platoon and squad leaders normally issue oral operations orders.

(1) To aid subordinates in understanding the concept for the mission, leaders should issue the order within sight of the objective or on the defensive terrain. When this is not possible, they should use a terrain model or sketch.

(2) Leaders must ensure that subordinates understand the mission, the commander’s intent, the concept of the operation, and their assigned tasks. Leaders may require subordinates to repeat all of part of the order or demonstrate on the model or sketch, their understanding of the operation. They should also quiz their soldiers to ensure that all soldiers understand the mission. Chapter 5 Infantry Platoon Tactical Standing Operating Procedure provides a list of questions that leaders can ask to determine if the soldiers understand the mission.

8. Supervise

The leader supervises the unit’s preparation for combat by conducting rehearsals and inspections.

(1) Rehearsals. The leader uses rehearsals to–

Practice essential tasks (improve performance).
Reveal weaknesses or problems in the plan.
Coordinate the actions of subordinate elements.
Improve soldier understanding of the concept of the operation (foster confidence in soldiers).

(a) Rehearsals include the practice of having squad leaders brief their planned actions in execution sequence to the platoon leader.

(b) The leader should conduct rehearsals on terrain that resembles the actual ground, and in similar light conditions.

(c) The platoon may begin rehearsals of battle drills and other SOP items before the receipt of the operation order. Once the order has been issued, it can rehearse mission specific tasks.

(d) Some important tasks to rehearse include–

Actions on the objective.
Assaulting a trench, bunker, or building.
Actions at the assault position.
Breaching obstacles (mine and wire).
Using special weapons or demolitions.
Actions on unexpected enemy contact.

(2) Inspections. Squad leaders should conduct initial inspections shortly after receipt of the warning order. The platoon sergeant spot checks throughout the unit’s preparation for combat. The platoon leader and platoon sergeant make a final inspection. They should inspect–

Weapons and ammunition.
Uniforms and equipment.
Mission-essential equipment.
Soldier’s understanding of the mission and their specific responsibilities.
Communications.
Rations and water.
Camouflage.
Deficiencies noted during earlier inspections.


History of the NCO (from FM 7-22.7)

You are a leader in the same Army that persevered at Valley Forge, held its ground at the Little Round Top, turned the tide of a war at St. Mihiel and began the liberation of a continent at Omaha Beach. You lead soldiers from the same Army that burst out of the Pusan Perimeter, won against enormous odds at the Ia Drang Valley, fought with determination at Mogadishu and relieved terrible misery in Rwanda. Leaders like you and soldiers like yours conducted intense combat operations in Afghanistan while only a short distance away others supported that nation’s rebuilding and still others fought fires in the northwestern US. Throughout the history of the Army the NCO has been there, leading soldiers in battle and training them in peacetime, leading by example and always, always – out front.

THE REVOLUTION TO THE CIVIL WAR

The history of the United States Army and of the noncommissioned officer began in 1775 with the birth of the Continental Army . The American noncommissioned officer did not copy the British. He, like the American Army itself, blended traditions of the French, British and Prussian armies into a uniquely American institution. As the years progressed, the American political system, with its disdain for the aristocracy, social attitudes and the vast westward expanses, further removed the US Army noncommissioned officer from his European counterparts and created a truly American noncommissioned officer.

The Revolution

In the early days of the American Revolution, little standardization of NCO duties or responsibilities existed. In 1778, during the long hard winter at Valley Forge, Inspector General Friedrich von Steuben standardized NCO duties and responsibilities in his Regulations for the Order and Discipline of the Troops of the United States (printed in 1779). His work, commonly called the Blue Book, set down the duties and responsibilities for corporals, sergeants, first sergeants, quartermaster sergeants and sergeants major, which were the NCO ranks of the period. The Blue Book also emphasized the importance of selecting quality soldiers for NCO positions and served a whole generation of soldiers as the primary regulation for the Army for 30 years. In fact, part of Von Steuben’s Blue Book is still with us in FM 22-5, Drill and Ceremonies and other publications.

Von Steuben specified duties of the noncommissioned officer. The Sergeant Major served as the assistant to the regimental adjutant, keeping rosters, forming details and handling matters concerning the “interior management and discipline of the regiment.” The Sergeant Major also served “at the head of the noncommissioned officers.” The Quartermaster Sergeant assisted the regimental quartermaster, assuming his duties in the quartermaster’s absence and supervising the proper loading and transport of the regiment’s baggage when on march. The First Sergeant enforced discipline and encouraged duty among troops, maintaining the duty roster, making morning report to the company commander and keeping the company descriptive book. This document listed the name, age, height, place of birth and prior occupation of every enlisted man in the unit.

The day-to-day business of sergeants and corporals included many roles. Sergeants and Corporals instructed recruits in all matters of military training, including the order of their behavior in regard to neatness and sanitation. They quelled disturbances and punished perpetrators. They forwarded sick lists to the First Sergeant. In battle, NCOs closed the gaps occasioned by casualties, encouraged men to stand their ground and to fire rapidly and accurately. The development of a strong NCO Corps helped sustain the Continental Army through severe hardships to final victory. Von Steuben’s regulations established the foundation for NCO duties and responsibilities from 1778 to the present.

During the early stages of the American Revolution the typical Continental Army NCO wore an epaulet to signify his rank. Corporals wore green and sergeants wore red epaulets. After 1779, sergeants wore two epaulets, while corporals retained a single epaulet. From the American Revolution to World War II the noncommissioned officer received his promotion from the regimental commander. Entire careers were often spent within one regiment. If a man transferred from one regiment to the next, he did not take his rank with him. No noncommissioned officer could transfer in grade from one regiment to another without the permission of the General in Chief of the Army; this was rarely done. Without permanent promotions of individuals, stripes stayed with the regiment.

The Purple Heart

Three NCOs received special recognition for acts of heroism during the American Revolution. These men, Sergeant Elijah Churchill, Sergeant William Brown and Sergeant Daniel Bissell, received the Badge of Military Merit, a purple heart with a floral border and the word “merit” inscribed across the center. In practice this award was the precursor to the Medal of Honor introduced during the Civil War. After a long period of disuse, Badge of Military Merit was reinstituted in 1932 as the Purple Heart and is a decoration for members of the armed forces wounded or killed in action or as a result of a terrorist attack.

Rank Insignia

In 1821 the War Department made the first reference to noncommissioned officer chevrons. A General Order directed that sergeants major and quartermaster sergeants wear a worsted chevron on each arm above the elbow; sergeants and senior musicians, one on each arm below the elbow; and corporals, one on the right arm above the elbow. This practice ended in 1829 but returned periodically and became a permanent part of the NCO’s uniform before the Civil War.

In 1825 the Army established a systematic method for selecting noncommissioned officers. The appointment of regimental and company noncommissioned officers remained the prerogative of the regimental commander. Usually regimental commanders would accept the company commander’s recommendations for company NCOs unless there were overriding considerations. The Abstract of Infantry Tactics, published in 1829, provided instructions for training noncommissioned officers. The purpose of this instruction was to ensure that all NCOs possessed “an accurate knowledge of the exercise and use of their firelocks, of the manual exercise of the soldier and of the firings and marchings.”

Field officers and the adjutant frequently assembled noncommissioned officers for both practical and theoretical instruction. Furthermore, field officers ensured that company officers provided proper instruction to their noncommissioned officers. The sergeant major assisted in instructing sergeants and corporals of the regiment. Newly promoted corporals and sergeants of the company received instruction from the First Sergeant. The first sergeant of that time, like today, was a key person in the maintenance of military discipline.

THE CIVIL WAR TO WORLD WAR 1

The Civil War

During the 1850’s major changes occurred in US Army weaponry. Inventors developed and refined the percussion cap and rifled weapons. Weapons like the Sharps carbine added greatly to fire power and accuracy. The increased lethality of weapons did not immediately result in different tactics. The huge numbers of casualties in the American Civil War proved that technological advances must result in changes to battlefield tactics. Operationally, the Civil War marked a distinct change in warfare. No longer was it sufficient to defeat an enemy’s army in the field. It was necessary to destroy the enemy’s will and capacity to resist through military, economic and political means. This became the concept of total war. The war required a large number of draftees and unprecedented quantities of supplies.

During the Civil War, noncommissioned officers led the lines of skirmishers that preceded and followed each major unit. NCOs also carried the flags and regimental colors of their units. This deadly task was crucial to maintain regimental alignment and for commanders to observe their units on the field. As the war progressed, organizational and tactical changes led the Army to employ more open battle formations. These changes further enhanced the combat leadership role of the noncommissioned officer. New technology shaped the Army during the Civil War: railroads, telegraph communications, steamships, balloons and other innovations. These innovations would later impact the noncommissioned officer rank structure and pay.

Since its founding on 14 June 1775, the Army normally expanded in wartime with volunteers, with the professional soldiers forming the basis for expansion. The Civil War in particular brought a huge increase in the number of volunteer soldiers. This policy endured to some extent until world commitments and the stationing of troops overseas in the 20th century required the Nation to maintain a strong professional force.

In the post-Civil War era the Artillery School at Fort Monroe reopened to train both officers and noncommissioned officers. In 1870 the Signal Corps established a school for training officers and noncommissioned officers. Because both the Artillery and the Signal Corps required soldiers to have advanced technical knowledge to operate complex equipment and instruments, these were the first schools established. Efforts to provide advanced education for noncommissioned officers in other less technical fields, however, failed to attract supporters. Army leaders thought experience and not the classroom made a good NCO.

Military Life on the Frontier

During the Indian Wars period, enlisted men lived in spartan barracks with corporals and privates in one large room. Sergeants lived separately from their men in small cubicles of their own adjacent to the men’s sleeping quarters. This gave enlisted men a sense of comradeship, but allowed little privacy.

During the 1870s the Army discouraged enlisted men from marrying. Regulations limited the number of married enlisted men in the Army and required special permission to marry. Those men who did marry without permission could be charged with insubordination. They could not live in post housing or receive other entitlements. Still, nature proved stronger than Army desires or regulations. Marriages occurred and posts became communities.

Barracks life in the 1890s was simple, with card games, dime novels and other amusements filling idle time. Footlockers contained personal possessions, along with military clothing and equipment. Soldiers during this period maintained handbooks that contained a variety of information, including sections entitled, “Extracts from Army Regulations of 1895,” “Examination of Enlisted Men for Promotion,” “Take Care of Your Health,” “Extracts from Articles of War,” and others. In the back there were three sections for the soldier to fill in: “Clothing Account,” “Military Service,” and “Last Will and Testament.” Soldiers carried these handbooks for a number of years and provided an accurate record of the important events in his Army life.

The increase of technology which accompanied modernization greatly affected the NCO Corps during the last half of the 19th Century. The number of NCO ranks grew rapidly; each new advent of technology created another pay grade. The Army was forced to compete with industry for technical workers. In 1908 Congress approved a pay bill which rewarded those in technical fields in order to retain their services. Combat soldiers were not so fortunate. A Master Electrician in the Coast Artillery made $75-84 per month, while an Infantry Battalion Sergeant Major lived on $25-34 per month. Compare that with a Sergeant of the Signal Corps ($34 – $43 per month).

Enlisted Retirement

In 1885 Congress authorized voluntary retirement for enlisted soldiers. The system allowed a soldier to retire after 30 years of service with threequarters of his active duty pay and allowances. This remained relatively unchanged until 1945 when enlisted personnel could retire after 20 years of service with half pay. In 1948 Congress authorized retirement for career members of the Reserve and National Guard. Military retirement pay is not a pension, but rather is delayed compensation for completing 20 or more years of active military service. It not only provides an incentive for soldiers to complete 20 years of service, but also creates a backup pool of experienced personnel in the event of a national emergency.

NCO Guide

The Army began to explicitly define NCO duties during the late 19th and early 20th centuries. The five or six pages of instructions provided by von Steuben’s Regulations for the Order and Discipline of the Troops of the United States in 1778 grew to 417 pages in the 1909 Noncommissioned Officers Manual. While an unofficial publication, it was widely used and the chapters describing the duties of the First Sergeant and Sergeant Major included common forms, a description of duties, what should and should not be done and customs of the service. The Noncommissioned Officers Manual included a chapter on discipline that stressed the role of punishment in achieving discipline. The manual stated that the purpose of punishment was to prevent the commission of offenses and to reform the offender. However, this section repeatedly stressed that treatment of subordinates should be uniform, just and in no way humiliating.

The Modern Rank Insignia

In 1902 the NCO symbol of rank, the chevron, rotated to what we would today call point up and became smaller in size. Though many stories exist as to why the chevron’s direction changed, the most probable reason was simply that it looked better. Clothing had become more form fitting, creating narrower sleeves; in fact, the 10-inch chevron of the 1880s would have wrapped completely around the sleeve of a 1902 uniform.

THE WORLD WARS AND CONTAINMENT

World War 1

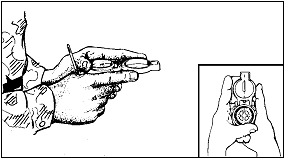
World War I required the training of four million men, one million of which would go overseas. Corporals were the primary trainers during this period, teaching lessons that emphasized weapons and daytime maneuvers. Training included twelve hours devoted to the proper use of the gas mask and a trip to the gas chamber. After viewing the differences in American and foreign NCO prestige, American Commanding General John J. Pershing suggested the establishment of special schools for sergeants and separate NCO messes. The performance of noncommissioned officers in the American Expeditionary Force seemed to validate these changes.

In 1922 the Army scheduled 1,600 noncommissioned officers for grade reductions. Although this was necessary to reduce the total force and save money, it caused severe hardships for many noncommissioned officers, especially those with families. Also, post-World War I budget reductions and the Great Depression led to irregularities in pay: often the soldier received only half his pay, or half his pay in money and half in consumer goods or food.

The rapid pace and acceptance of technology during the late 1930s caused the Army to create special “technician” ranks in grades 3, 4, & 5 (CPL, SGT & SSG), with chevrons marked with a “T.” This led to an increase in promotions among technical personnel. The technician ranks ended in 1948, but they later reappeared as ‘specialists’ in 1955.

The typical First Sergeant of this period carried his administrative files in his pocket-a black book. The book contained the names of everyone in the company and their professional history (AWOLs, work habits, promotions, etc.). The book passed from first sergeant to first sergeant, staying within the company and providing the unit with a historical document. The first sergeant accompanied men on runs, the drill field, training, or the firing range. He was always at the forefront of everything the company did.

World War 2

With the attack on Pearl Harbor in December 1941, the United States found itself in another major war. Mobilization greatly increased the numbers of Army noncommissioned officers. Ironically, mobilization, combined with other factors, created a staggering growth in the percentage of noncommissioned officers to total forces. The proportion of noncommissioned officers in the Army increased from 20 percent of the enlisted ranks in 1941, to nearly 50 percent in 1945, resulting in reduced prestige for many noncommissioned officer ranks. Coupled with this growth in numbers the eight-man infantry squad increased to twelve, with the sergeant then staff sergeant, replacing the corporal as its leader. The rank of corporal came to mean very little, even though he was in theory and by tradition a combat leader.

Basic training in World War II focused on hands-on experience instead of the classroom. NCOs conducted all training for soldiers. After basic training, a soldier went to his unit where his individual training continued. The major problem was that the rapid expansion of the Army had led to a proportionate decrease in experienced men in the noncommissioned officer ranks. Making this condition worse was the practice of quickly advancing in rank soldiers who showed potential while combat losses reduced the number of experienced NCOs.

Fighting in the Pacific and Europe required large numbers of men. Millions of men enlisted and America drafted millions more. Still the Army suffered from manpower shortages. In 1942 the Army formally added women to its ranks. By 1945 over 90,000 women had enlisted in the Army. Women served in administrative, technical, motor vehicle, food, supply, communications, mechanical and electrical positions during the war. After the war women continued to serve in a variety of roles in the Army. As a result of the continued growth of technology, a new emphasis on education began in the post-World War II era. This emphasis encouraged the young soldier to become better educated in order to advance in rank.

NCO Education I

On 30 June 1947 the first class enrolled in the 2d Constabulary Brigade’s NCO school, located in Munich, Germany. Two years later, the US Seventh Army took over the 2d Constabulary functions and the school became the Seventh Army Noncommissioned Officers Academy. Eight years later AR 350-90 established Army-wide standards for NCO academies. Emphasis on NCO education increased to the point that by 1959 over 180,000 soldiers would attend NCO academies located in the continental United States. In addition to NCO academies, the Army encouraged enlisted men to advance their education by other means. By 1952 the Army had developed the Army Education Program to allow soldiers to attain credits for academic education. This program provided a number of ways for the enlisted man to attain a high school or college diploma.

Korea

In 1950 an unprepared United States again had to commit large numbers of troops in a war a half a world away. The North Korean attack on South Korea stressed American responsibilities overseas. Containment of communist aggression was the official policy of the United States. This meant that American commitments in Asia, Europe and the Pacific would require a strong and combat-ready professional Army. During the Korean War the NCO emerged more prominently as a battle leader than he had in World War II. The steep hills, ridges, narrow valleys and deep gorges forced many units to advance as squads. Korea was the first war America fought with an integrated Army. Black and white soldiers together fought a common foe.

In 1958 the Army added two grades to the NCO ranks. These pay grades, E-8 and E-9, would “provide for a better delineation of responsibilities in the enlisted structure.” With the addition of these grades, the ranks of the NCO were corporal, sergeant, staff sergeant, sergeant first class, master sergeant and sergeant major.

Vietnam

America’s strategy of containment continued after the Korean War and the Nation set a course to help its ally South Vietnam defeat communist aggression. In 1965 America made a major commitment in ground troops to Vietnam. The Vietnamese Communists fought a long drawn-out war, meant to wear down American forces. Because no clear battle lines existed it was often hard to tell foe from friend. In 1973 a formal cease-fire signed by American and North Vietnamese delegations ended American troop commitments to the area.

Vietnam proved to be a junior leader’s war with decentralized control. Much of the burden of combat leadership fell on the NCO. With a need for large numbers of NCOs for combat duty, the Army began the Noncommissioned Officer Candidate Course, with three sites at Fort Benning, Fort Knox and Fort Sill. After a 12-week course, the graduate became an E-5; those in the top five percent became E-6s. An additional 10 weeks of hands-on training followed and then the NCO went to Vietnam. However, senior NCOs had mixed feelings about the program (sometimes called the “shake-and-bake” program). Many of these senior NCOs thought it undermined the prestige of the NCO Corps though few could say they actually knew an unqualified NCO from the course.

Sergeant Major of the Army

In 1966 Army Chief of Staff Harold K. Johnson chose Sergeant Major William O. Wooldridge as the first Sergeant Major of the Army . The SMA was to be the primary advisor and consultant to the Chief of Staff on enlisted matters. He would identify problems affecting enlisted personnel and recommend appropriate solutions.

POST-VIETNAM AND THE VOLUNTEER ARMY

NCO Education II

After the US ended conscription following the Vietnam War, it became increasingly clear NCOs needed more sustained training throughout their careers. NCO education expanded and became formalized in the 70s and 80s. Today’s NCO Education System includes the Primary Leadership Development Course (PLDC), Basic Noncommissioned Officer Course (BNCOC), the Advanced Noncommissioned Officer Course (ANCOC), and the US Army Sergeants Major Course (USASMC). The Sergeants Major Course first began in January 1973 as the capstone training for the Army’s most senior NCOs. The Sergeants Major Academy also operates three senior NCO courses outside NCOES that are designed to train NCOs for particular positions. These are the First Sergeant Course (FSC), the Battle Staff Course (BSC) and the Command Sergeant Major Course (CSMC). In 1986 PLDC became a mandatory prerequisite for promotion to staff sergeant. This was the first time an NCOES course actually became mandatory for promotion.

In 1987 the Army completed work on a new state-of-the-art education facility at the Sergeants Major Academy at Fort Bliss, Texas, further emphasizing the importance of professional education for NCOs. This 17.5 million-dollar, 125,000 square foot structure allowed the academy to expand course loads and number of courses. As the Noncommissioned Officer Education System continues to grow, the NCO of today combines history and tradition with skill and ability to prepare for combat. He retains the duties and responsibilities given to him by von Steuben in 1778 and these have been built upon to produce the soldier of today.

Grenada and Panama

The murder of Grenada’s Prime Minister in October 1983 created a breakdown in civil order that threatened the lives of American medical students living on the island. At the request of allied Caribbean nations, the United States invaded the island to safeguard the Americans there. Operation Urgent Fury included Army Rangers and Paratroopers from the 82nd Airborne Division. This action succeeded in the eventual reestablishment of a representative form of government in Grenada. After Manuel Noriega seized control of his country in 1983, corruption in the Panamanian government became widespread and eventually Noriega threatened the security of the United States by cooperating with Colombian drug producers. Harassment of American personnel increased and after a US Marine was shot in December 1989, the US launched Operation Just Cause. This invasion, including over 25,000 soldiers, quickly secured its objectives. Noriega surrendered on 3 January 1990 and was later convicted on drug trafficking charges.

The Gulf War

In August 1990 Iraqi military forces invaded and occupied Kuwait. The US immediately condemned Iraq’s actions and began building support for a coalition to liberate Kuwait. Iraq’s dictator, Saddam Hussein, ignored the demands of over 36 nations to leave Kuwait. In response, coalition forces began deploying to Saudi Arabia. On 12 January 1991 Congress authorized the use of military force to liberate Kuwait. Operation Desert Storm commenced 17 January 1991 as the coalition initiated an air campaign to disable Iraq’s infrastructure. After five weeks of air and missile attacks, ground troops, including over 300,000 from the US Army, began their campaign to free Kuwait. On 27 February 1991, coalition forces entered Kuwait City forcing Iraq to concede a cease-fire after only 100 hours of ground combat.

Somalia and Rwanda

In the early 1990s Somalia was in the worst drought in over a century and its people were starving. The international community responded with humanitarian aid but clan violence threatened international relief efforts. The United Nations formed a US-led coalition to protect relief workers so aid could continue to flow into the country. Operation Restore Hope succeeded, ending the starvation of the Somali people. US soldiers also assisted in civic projects that built and repaired roads, schools, hospitals and orphanages. A history of ethnic hatred in Rwanda led to murder on a genocidal scale. Up to a million Rwandans were killed and two million Rwandans fled and settled in refugee camps in several central African locations. Conditions in the camps were appalling; starvation and disease took even more lives. The international community responded with one of the largest humanitarian relief efforts ever mounted. The US military quickly established an atmosphere of collaboration and coordination setting up the necessary infrastructure to complement and support the humanitarian response community. In Operation Support Hope, US Army soldiers provided clean water, assisted in burying the dead and integrated the transportation and distribution of relief supplies.

Haiti

In December 1990 Jean-Bertrand Aristide was elected President of Haiti, in an election that international observers deemed largely free and fair. Aristide took office in February 1991, but was overthrown by the Army and forced to leave the country. The human rights climate deteriorated as the military and the de facto government sanctioned atrocities in defiance of the international community’s condemnation. The United States led a Multinational Force to restore democracy by removing the military regime, return the previously elected Aristide regime to power, ensure security, assist with the rehabilitation of civil administration, train a police force, help prepare for elections and turn over responsibility to the UN. Operation Uphold Democracy succeeded both in restoring the democratically elected government of Haiti and in stemming emigration. In March 1995 the United States transferred the peacekeeping responsibilities to the United Nations.

The Balkans

During the mid-1990s, Yugoslavia was in a state of unrest because various ethnic groups wanted a separate state for themselves. Serbia attempted through military force to prevent any group from gaining autonomy from the central government. Serbian forces brutally suppressed the separatist movement of ethnic Albanians in the province of Kosovo, leaving hundreds dead and over 200,000 homeless. The refusal of Serbia to negotiate peace and strong evidence of mass murder by Serbian forces resulted in the commencement of Operation Allied Force. Air strikes against Serbian military targets continued for 78 days in an effort to bring an end to the atrocities that continued to be waged by the Serbs. Serbian forces withdrew and NATO deployed a peacekeeping force, including US Army soldiers, to restore stability to the region and assist in the repair of the civilian infrastructure.

The War on Terrorism

Terrorists of the al-Qaeda network attacked the United States on September 11, 2001, killing nearly 3000 people and destroying the World Trade Center in New York City. The United States, with enormous support from the global community, responded with attacks on the al-Qaeda network and the Taliban-controlled government of Afghanistan that was providing it support. Operation Enduring Freedom with US and allied forces quickly toppled the Taliban regime and severely damaged the al-Qaeda forces in Afghanistan. US Army NCOs and soldiers continue to play a leading role in the war on terrorism and provide security to the Nation.

CONTEMPORARY OPERATIONAL ENVIRONMENT

Full Spectrum Operations

Today the Army’s operational doctrine covers the full spectrum of operations. That means stability, support, offense and defense operations. What that means to you is to conduct good training and make sure your soldier meets the standards. Effective training is the cornerstone of operational success. Training to high standards is essential for a full spectrum force; the Army cannot predict every operation it deploys to. Battle-focused training on combat tasks prepares soldiers, units and leaders to deploy, fight and win. Upon alert, initial-entry Army forces deploy immediately, conduct operations and complete any needed mission-specific training in country. Follow-on forces conduct pre- or post-deployment mission rehearsal exercises, abbreviated if necessary, based on available time and resources.

The Operational Environment

America’s potential adversaries learned from the Gulf War that to oppose US forces on our terms is foolhardy at best and may even be suicidal. As demonstrated by terrorist adversaries, we can expect that our enemies in the future will attempt to avoid decisive battle; prolong the conflict; conduct sophisticated ambushes; disperse combat forces and attempt to use information services to its advantage – all while inflicting unacceptable casualties on US forces.

The operational environment and the wide array of threats present significant challenges. Army forces must simultaneously defeat an adversary while protecting noncombatants and the infrastructure on which they depend. This requires Army leaders to be adaptive and aware of their environment.

Depending on your mission and location, you and your soldiers, or perhaps the local population may be the targets of a terrorist attack. An adversary may try to use you in an information campaign to destroy US resolve. The more vital your units’ mission is to the overall operation the more likely it is that an adversary will attempt to target you in some way.

The Information Environment

All military operations take place within an information environment that is not within the control of military forces. The information environment is the combination of individuals, organizations and systems that collect, process, store, display and disseminate information. It also includes the information itself. The media’s use of real-time technology affects public opinion and may alter the conduct of military operations. Now, more than ever, every soldier represents America – potentially to a global audience.

Technology enhances leader, unit and soldier performance and affects how Army forces conduct full spectrum operations in peace, conflict and war. Even with its advantages, the side with superior technology does not always win in land operations; rather, the side that applies combat power more skillfully usually prevails. The skill of soldiers coupled with the effectiveness of leaders decides the outcomes of engagements, battles and campaigns.

ARMY TRANSFORMATION

The NCO has a key role in Army Transformation, perhaps the premier role. As the Army becomes a more deployable, agile and responsive force, some units will reorganize, receive new equipment and learn new tactics. The NCO, as the leader most responsible for individual and small unit training, will build the foundation for the Army’s objective force. New technology enables you to cover more ground and maintain better situational awareness. But individual and collective tasks are more complex, requiring small unit leaders to coordinate and synchronize soldiers’ efforts and the systems they employ to a degree never before seen.

Our Army has always benefited from NCOs who could and did display initiative, make decisions and seize opportunities that corresponded with the commander’s intent. These qualities are more important than ever in Army Transformation. Despite technological improvement and increased situational awareness at every level – the small unit leader must still make decisions that take advantage of fleeting opportunities on the battlefield.


Duties, Responsibilities and Authority Explained

As a noncommissioned officer, you have duties, responsibilities and authority

DUTY:

A duty is something you must do by virtue of your position and is a legal or moral obligation. For example, it is the supply sergeant’s duty to issue equipment and keep records of the unit’s supplies. It is the first sergeant’s duty to hold formations, instruct platoon sergeants and assist the commander in supervising unit operations. It is the duty of the squad/section/team leader to account for his soldiers and ensure that they receive necessary instructions and are properly trained to perform their jobs.

A noncommissioned officer’s duties are numerous and must be taken seriously. An NCO’s duty includes taking care of soldiers, which is your priority. Corporals and sergeants do this by developing a genuine concern for their soldiers’ well-being. Leaders must know and understand their soldiers well enough to train them as individuals and teams to operate proficiently. This will give them confidence in their ability to perform well under the difficult and demanding conditions of battle. Individual training is the principle duty and responsibility of NCOs. No one in the Army has more to do with training soldiers than NCOs. Well trained soldiers will likely succeed and survive on the battlefield. Well trained soldiers properly do the tasks their NCOs give them. A good leader executes the boss’s decisions with energy and enthusiasm; looking at their leader, soldiers will believe the leader thinks it’s absolutely the best possible solution.

There may be situations you must think carefully about what you’re told to do. For example, duty requires that you refuse to obey illegal orders. This is not a privilege you can claim, but a duty you must perform. You have no choice but to do what’s ethically and legally correct. Making the right choice and acting on it when faced with an ethical question can be difficult. Sometimes, it means standing your ground and telling your supervisor you think their wrong. If you think an order is illegal, first be sure that you understand both the details of the order and its original intent. Seek clarification from the person who gave the order. This takes moral courage, but the question will be straightforward: Did you really mean for me to… steal the part… submit a false report… shoot the prisoners?

If the question is complex and time permits, seek advice from legal assistance. However, if you must decide immediately, as in the heat of combat, make the best judgment possible based on the Army values and attributes, your experience and your previous study and reflection. You take a risk when you disobey what you perceive to be an illegal order. Talk to your superiors, particularly those who have done what you aspire to do or what you think you’ll be called on to do; providing counsel of this sort is an important part of leadership. Obviously, you need to make time to do this before you’re faced with a tough call. This could possibly be the most difficult decision you’ll ever make, but that’s what leaders do.

Noncommissioned officers have three types of duties: specified duties, directed duties and implied duties.

Specified duties are those related to jobs and positions. Directives such as Army regulations, Department of the Army (DA) general orders, the Uniform Code of Military Justice (UCMJ), soldier’s manuals, Army Training and Evaluation Program (ARTEP) publications and MOS job descriptions specify the duties. For example, AR 600-20 says that NCOs must ensure that their soldiers get proper individual training and maintain personal appearance and cleanliness.

Directed duties are not specified as part of a job position or MOS or other directive. A superior gives them orally or in writing. Directed duties include being in charge of quarters (CQ) or serving as sergeant of the guard, staff duty officer, company training NCO and NBC NCO, where these duties are not found in the unit’s organization charts.

Implied duties often support specified duties, but in some cases they may not be related to the MOS job position. These duties may not be written but implied in the instructions. They’re duties that improve the quality of the job and help keep the unit functioning at an optimum level. In most cases, these duties depend on individual initiative. They improve the work environment and motivate soldiers to perform because they want to, not because they have to. For example, while not specifically directed to do so, you hold in-ranks inspections daily to ensure your soldiers’ appearance and equipment are up to standards.

RESPONSIBILITY:

Responsibility is being accountable for what you do or fail to do. NCOs are responsible to fulfill not only their individual duties, but also to ensuretheir teams and units are successful. Any duty, because of the position you hold in the unit, includes a responsibility to execute that duty. As an NCO, you are accountable for your personal conduct and that of your soldiers. Also, each soldier is individually responsible for his own personal conduct and that responsibility cannot be delegated. A soldier is accountable for his actions to fellow soldiers, leaders, unit and the US Army.

As a leader you must ensure that your soldiers clearly understand their responsibilities as members of the team and as representative of the Army. Commanders set overall policies and standards, but all leaders must provide the guidance, resources, assistance and supervision necessary for soldiers to perform their duties. Mission accomplishment demands that officers and NCOs work together to advise, assist and learn from each other. Responsibilities fall into two categories: command and individual.

Command responsibility refers to collective or organizational accountability and includes how well the unit performs their missions. For example, a company commander is responsible for all the tasks and missions assigned to the company; his superiors hold him accountable for completing them. Commanders give military leaders the responsibility for what their sections, units, or organizations do or fail to do. NCOs are therefore responsible to fulfill not only their individual duties, but also to ensure that their team and unit are successful. The amount of responsibility delegated to you depends on your mission, the position you hold and your own willingness to accept responsibility.

One point you need to get straight is that although a list of duties can be drawn up describing what is expected of you, it will not tell you how to do your job. For example, one of an NCO’s duties is to enforce standards of military appearance. This means you are responsible for correcting soldiers who wear the uniform improperly and for teaching them the correct standards of appearance. It also means that you should inspect for proper and serviceability, clothing and equipment of your soldiers. Remember that you must set the example first and your soldiers will follow in your footsteps.

Individual responsibility as a noncommissioned officer means you are accountable for your personal conduct. Soldiers in the Army have their own responsibilities. For example, if you write a check at the commissary, it is your responsibility to have sufficient funds in the bank account to cover the check. Individual responsibility cannot be delegated; it belongs to the soldier that wrote the check. Soldiers are accountable for their actions, to their fellow soldiers, to their leaders, to their unit and to the United States Army. As a leader you must ensure that your soldiers understand clearly their responsibilities as members of the team and as representatives of the Army.

AUTHORITY

As a noncommissioned officer, you must know what authority you have and where it comes from. You are also expected to use good judgment when exercising your authority.

Authority is defined as the right to direct soldiers to do certain things. Authority is the legitimate power of leaders to direct soldiers or to take action within the scope of their position. Military authority begins with the Constitution, which divides it between Congress and the President. The President, as commander in chief, commands the armed forces, including the Army. The authority from the Commander-in-Chief extends through the chain of command, with the assistance of the NCO support channel, to the squad, section or team leader who then directs and supervises the actions of individual soldiers. When you say, “PFC Lee, you and PFC Johnson start filling sandbags; SPC Garcia and SPC Smith will provide security from that hill,” you are turning into action the orders of the entire chain of command.

In the Army there are two basic types of authority: command authority and general military authority.

Command authority is the authority leaders have over soldiers by virtue of rank or assignment. Command authority originates with the President and may be supplemented by law or regulation. Even though it is called “command” authority, it is not limited to officers – you have command authority inherent in your leadership position as a tank commander or team leader, for example. Noncommissioned officers’ command authority is inherent with the job by virtue of position to direct or control soldiers.

Leading soldiers includes the authority to organize, direct and control your assigned soldiers so that they accomplish assigned missions. It also includes authority to use assigned equipment and resources to accomplish your missions. Remember that this only applies to soldiers and facilities in your unit. For example, if the platoon sergeant of first platoon goes on leave and a squad leader is put in charge, that squad leader has command authority over only first platoon, until he is relieved from the responsibility. The soldiers in first platoon will obey the squad leader’s orders due to his position. However, the squad leader does not have command authority over another platoon.

General military authority is authority extended to all soldiers to take action and act in the absence of a unit leader or other designated authority. It originates in oaths of office, law, rank structure, traditions and regulations. This broad-based authority also allows leaders to take appropriate corrective actions whenever a member of any armed service, anywhere, commits an act involving a breach of good order or discipline. For example, if you see soldiers in a brawl, you have the general military authority (and the obligation) to stop the fight. This authority applies even if none of the soldiers are in your unit.

General military authority exists whether you are on duty or not, in uniform or in civilian attire and regardless of location. For example, you are off duty, in civilian clothes and in the PX and you see a soldier in uniform with his headgear raised up and trousers unbloused. You stop the soldier immediately, identify yourself and ensure the soldier understands and makes the necessary corrections. If he refuses, saying you don’t have the authority to tell him what to do because he’s not in your NCO support channel, the soldier is wrong.

You as an NCO have both general military authority and the duty to enforce standards as outlined in AR 670-1. Your authority to enforce those regulations is specified in AR 600-20 and if you neglect your duty, you can be held accountable. If the soldier refuses to obey you, what can you do? For starters, you can explain that you have authority regardless of your location, your unit, or whether you are in uniform or civilian attire. You may decide to settle for the soldier’s name and unit. If so, a phone call to his first sergeant should be more than enough to ensure that such an incident does not recur.

Delegation of authority. Just as Congress and the President cannot participate in every aspect of the armed forces operations, most leaders cannot handle every action directly. To meet the organization’s goals, officers delegate authority to NCOs in the NCO Support Channel who, in turn, may further delegate that authority. Unless restricted by law, regulation, or a superior, leaders may delegate any or all of their authority to their subordinate leaders. However, such delegation must fall within the leader’s scope of authority. Leaders cannot delegate authority they do not have and subordinate leaders may not assume authority that superiors do not have, cannot delegate, or have retained. The task or duty to be performed limits the authority of the leader to whom it is assigned.

Both command and general military authority originate in the Constitution and Congress has further defined them in law. More explicit sources are Army Regulations, the Manual for Courts Martial (MCM) and the chain of command/NCO support channel.

You don’t need to read or remember all Army Regulations (ARs) but study those that pertain to your job. If necessary, ask other NCOs to help you find out what regulations pertain to you, where they can be found and how to interpret them. Start with AR 600-20. It covers enlisted soldiers’ and noncommissioned officers’ authority and responsibilities.

The Manual for Courts Martial (MCM, 2002) describes legal aspects of the authority of the noncommissioned officer. It states in part that, “All commissioned officers, warrant officers and noncommissioned officers are authorized to stop quarrels, frays and disorders among persons subject to the code….” Severe penalties are imposed for violations such as disrespect, insubordination, or assault. No one expects you to be an expert on military law, but as a noncommissioned officer you should know the definition of these words and be able to explain them to your soldiers. Your legal clerk can be a good source of information.

Authority of the NCO is part of the equation in military discipline.

Your authority also stems from the combination of the chain of command and the NCO support channel. Orders and policies that pass through the chain of command or the NCO support channel automatically provide the authority necessary to get the job done. With such broad authority given to all commissioned officers and noncommissioned officers, the responsibility to use mature, sound judgment is critical. The chain of command backs up the NCO support channel by legally punishing those who challenge the NCO’s authority. But it does so only if the noncommissioned officer’s actions and orders are sound, intelligent and based on proper authority. To be a good leader, you should learn what types of authority you have and where it comes from. Whenever in doubt, ask. Once you’re confident that you know the extent of your authority, use sound judgment in applying it. Then you will be a leader respected by both your soldiers and superiors.


Grid Coordinates

Finding your location on a map using grid coordinates

The map has vertical lines (top to bottom) and horizontal lines (left to right). These lines form small squares 1,000 meters on each side called grid squares.

The lines that form grid squares are numbered along the outside edge of the map picture. No two grid squares have the same number.

The precision of a point location is shown by the number of digits in the coordinates: the more digits, the more precise the location.

1996-a 1,000 meter grid square.
192961-to the nearest 100 meters.
19269614-to the nearest 10 meters

Look at Figure 1. Your address is grid square 1181. How do you know this? Start from the left and read right until you come to 11, the first half of your address. Then read up to 81, the other half. Your address is somewhere in grid square 1181.

NOTE:
Always begin your reading from the southwest corner of your square.

Grid Coordinates

Grid square 1181 gives your general neighborhood, but there is a lot of ground inside that grid square. To make your address more accurate, just add another number to the first half and another number to the second half-so your address has six numbers instead of four.

To get those extra numbers, pretend that each grid square has ten lines inside it running north and south, and another 10 running east and west. This makes 100 smaller squares. You can estimate where these imaginary lines are.

Suppose you are halfway between grid line 11 and grid line 12. Then the next number is 5 and the first half of your address is 115. Now suppose you are also 3/10 of the way between grid line 81 and grid line 82. Then the second half of your address is 813. (If you were exactly on line 81, the second part would be 810). Your address is 115813 (B, Figure 5 18).

The most accurate way to determine the coordinates of a point on a map is to use a coordinate scale. You do not have to use imaginary lines; you can find the exact coordinates using a Coordinate Scale and Protractor. This device has two coordinating scales, 1:25,000 meters and 1:50,000 meters. Make sure you use the correct scale.

Grid Coordinates 2

First, locate the grid square in which the point (for example, Point A, Figure 2) is located (the point should already be plotted on the map).

The number of the vertical grid line on the left (west) side of the grid square is the first and second digits of the coordinates.

The number of the horizontal grid line on the bottom (south) side of the grid square is the fourth and fifth digits of the coordinates.

Grid Coordinates 3

To determine the third and sixth digits of the coordinates, place the coordinate scale on the bottom horizontal grid line of the grid square containing Point A.

Check to see that the zeros of the coordinate scale are in the lower left hand (southwest) corner of the map grid square.

Slide the scale to the right, keeping the bottom of the scale on the bottom grid line until Point A is under the vertical (right hand) scale (Figures 3 and 4).

Grid Coordinates 4

On the bottom scale, the 100 meter mark nearest the vertical grid line provides the third digit, 5. On the vertical scale, the 100 meter mark nearest Point A provides the sixth digit, 3. Therefore, the six-digit grid coordinate is 115813

Grid Coordinates 5
 

© Education Connection 2024. All Rights Reserved.

*https://nces.ed.gov/programs/digest/d20/tables/dt20_311.15.asp

Sources for school statistics is the U.S. Department of Education’s National Center for Education Statistics.

Disclosure: EducationDynamics receives compensation for the featured schools on our websites (see “Sponsored Schools” or “Sponsored Listings” or “Sponsored Results”).  So what does this mean for you? Compensation may impact where the Sponsored Schools appear on our websites, including whether they appear as a match through our education matching services tool, the order in which they appear in a listing, and/or their ranking.  Our websites do not provide, nor are they intended to provide, a comprehensive list of all schools (a) in the United States (b) located in a specific geographic area or (c) that offer a particular program of study.  By providing information or agreeing to be contacted by a Sponsored School, you are in no way obligated to apply to or enroll with the school.

This is an offer for educational opportunities, not an offer for nor a guarantee of employment. Students should consult with a representative from the school they select to learn more about career opportunities in that field. Program outcomes vary according to each institution’s specific program curriculum. Financial aid may be available to those who qualify. The financial aid information on this site is for informational and research purposes only and is not an assurance of financial aid.

1 You must apply for a new loan each school year. This approval percentage is based on students with a Sallie Mae undergraduate loan in the 2018/19 school year who were approved when they returned in 2019/20. It does not include the denied applications of students who were ultimately approved in 2019/20.

2 This promotional benefit is provided at no cost to borrowers with new loans that disburse between May 1, 2021 and April 30, 2022. Borrowers are not eligible to activate the benefit until July 1, 2021. Borrowers who reside in, attend school in, or borrow for a student attending school in Maine are not eligible for this benefit. Chegg Study® offers expert Q&A where students can submit up to 20 questions per month. No cash value. Terms and Conditions apply. Please visit http://www.chegg.com/legal/smtermsandconditions for complete details. This offer expires one year after issuance.